

Whenever a friend asks me about decorating for a themed party, the very first thing I do is go on Pinterest to see what ideas I can steal/mesh together/expand on. So when I was asked about 80s party decorations for a friend’s 40th birthday, I pulled up Pinterest, saw THIS, and I was immediately up for the challenge to see how I could make a DJ booth similar to this (which I believe rents for $650!)…but on the cheap.

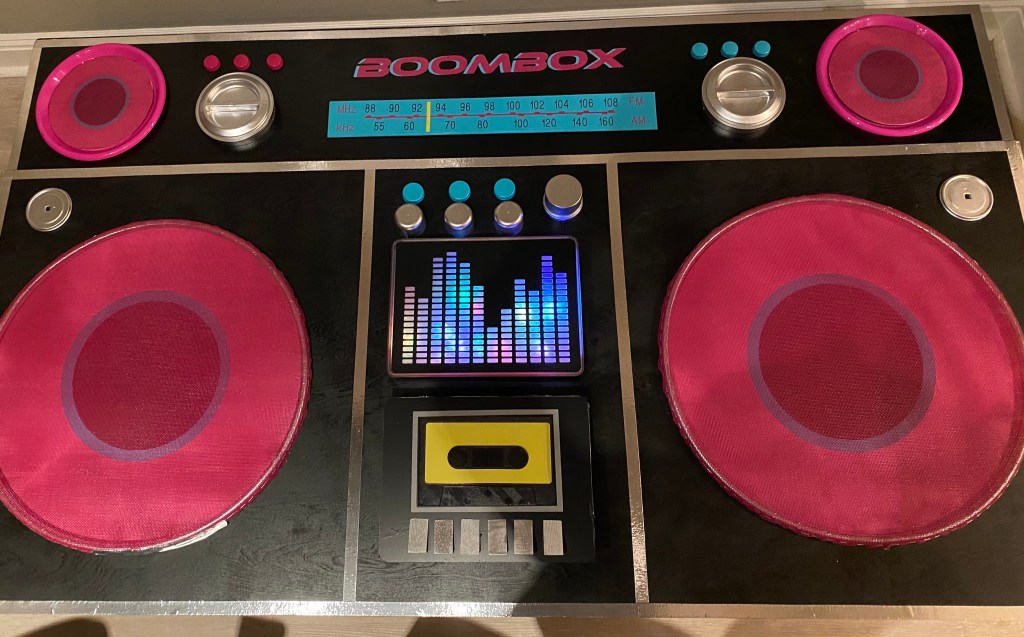
This is a view of the finished product of my version, which I made for ~$120!


Here is a video tutorial on how I made it:
Here are all the details on the project:
First off, I wanted to show the original prototype for it – the idea being that the front would be a facade that wraps around a table (and not sure why this piece of card got so wet and beat up!). I always try to make some kind of prototype first, A) so I can see if the idea makes any sense in reality and B) to help communicate my ideas to others so when I go to Home Depot looking for stuff, the sales assistants there would know what on earth I was talking about.

Originally, I was planning on having the entire boombox be entirely a facade like the prototype, but then I realized it wouldn’t look realistic if it didn’t have any depth. So I changed the design to have the facade go up to the height of the table, and then have a “box” like top to sit on the table.
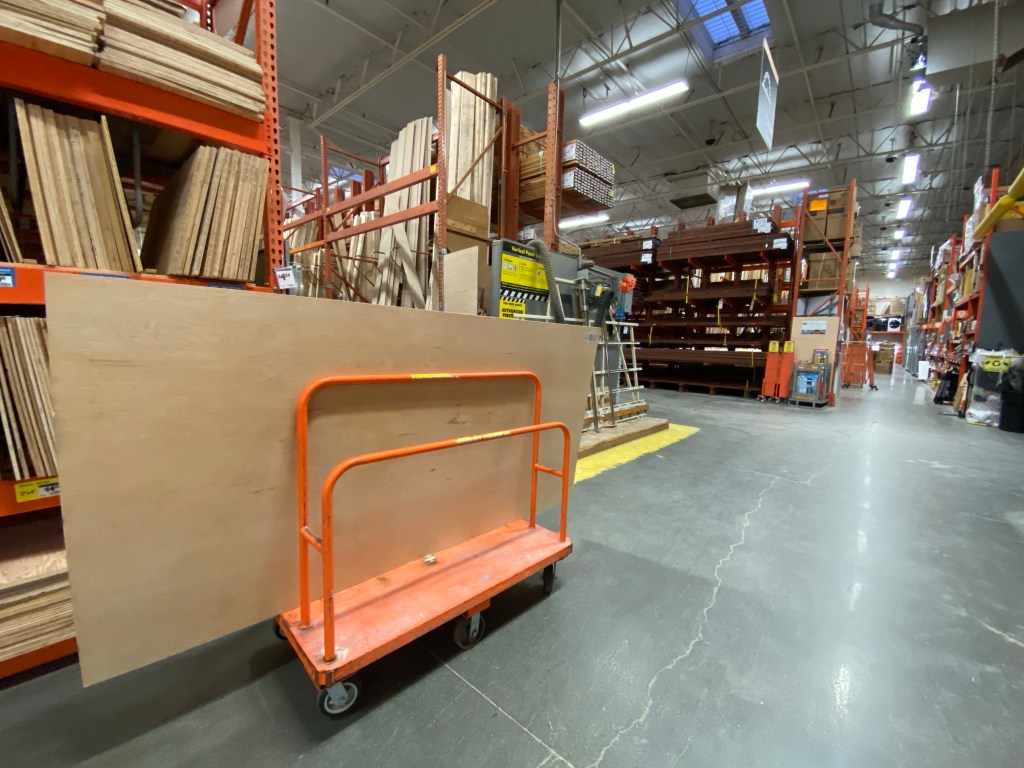
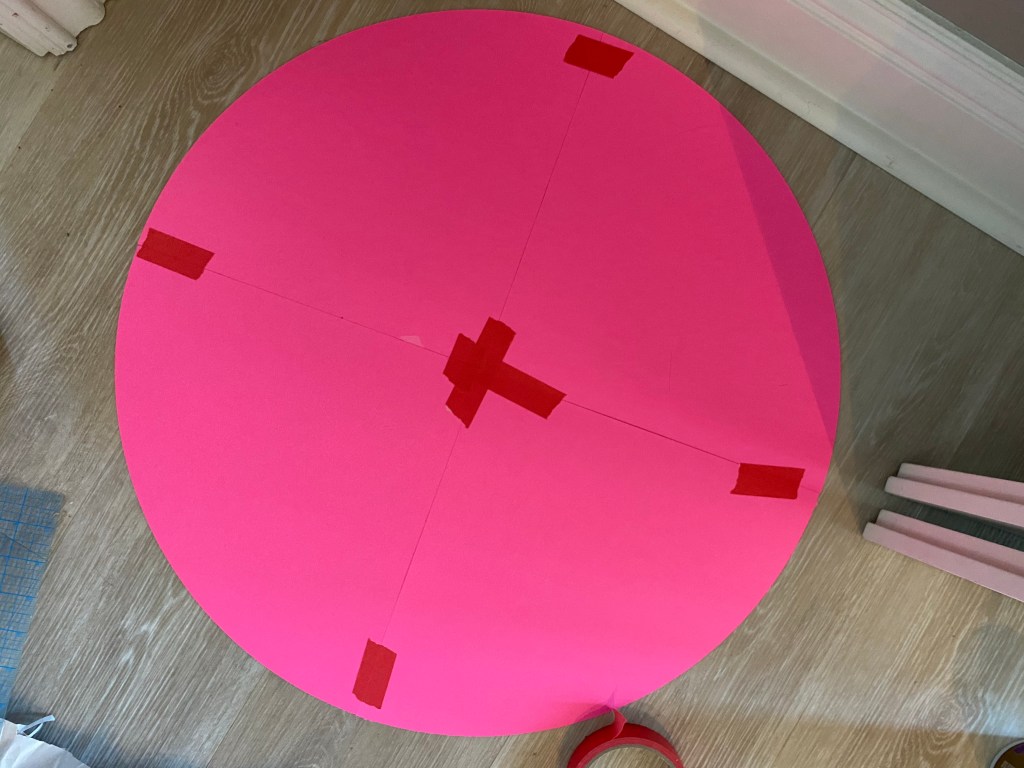
I wanted it to fit around a regular 6 foot wide folding table, as well as being able to fit in my car, so it could be easily transportable, so I used these dimensions to figure out how to get the wood cut.
Home Depot was my first destination to get the wood. I found cheapish thin wood (it is 5mm thick underlayment that was about $18 a sheet). I needed two sheets cut, and then I also got them to cut some thicker wood to use as the struts to hold together the box top. (Note – the underlayment wood is pretty flimsy, and it worked ok for the price, but if you wanted to make a sturdier version, I would go with thicker, stiffer wood). The front of the boombox had two sections that were 6 feet long, one 30″ high to go from the floor to just above the table height, and one 12 high to sit on the table. Then I had the sides cut to 12″ deep, with the same 30″ and 12″ heights to match the front.


I collected some junk/cheap items from dollar stores to create the different aspects of the boombox. The hula hoop speakers were from the dollar store, as were the pink plastic plates for the smaller speakers. The white speakers were the tops of drink containers. I laid out the pieces to start planning the super rough design. As you can tell from the final pictures of the boombox, the design evolved quite a bit as I played around with different ideas.

My husband hinged the facade pieces together, and then constructed the box top, with one strut on either side, and two struts across the middle.


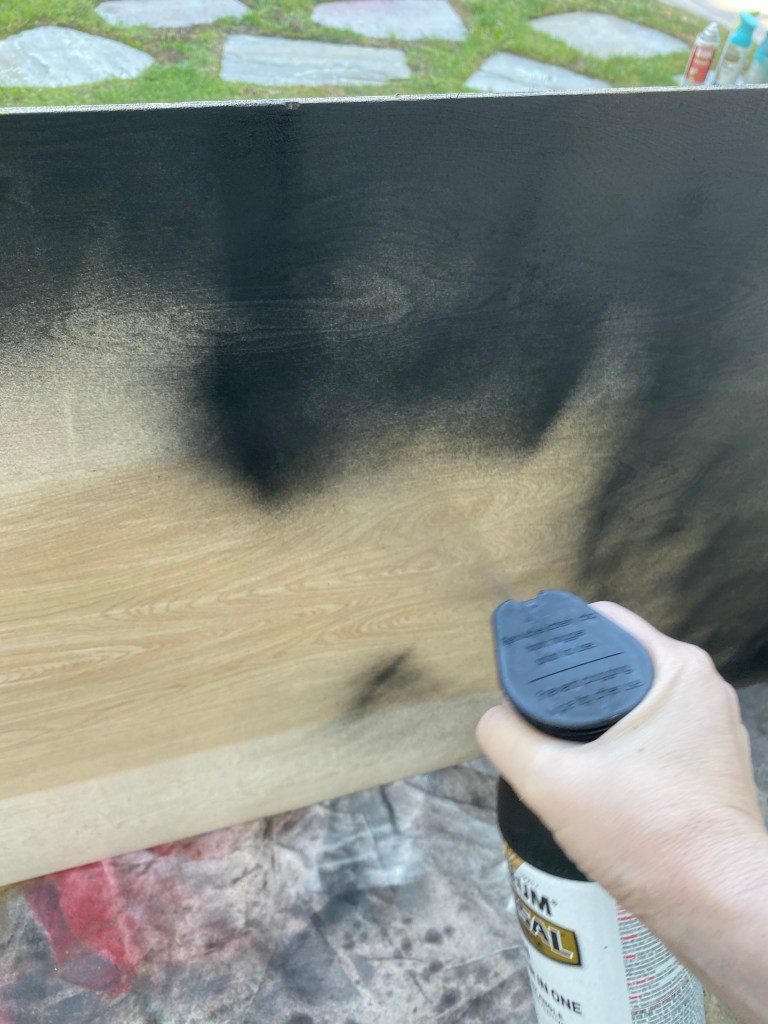
I spray painted the wood – first with a white primer (note to self that black or gray primer would have made more sense!!!) and then with a black satin paint. The paint showed up a lot of the grain in the wood, which I didn’t love, so if I were to make it again I would see whether a flat black paint might be better at masking it.


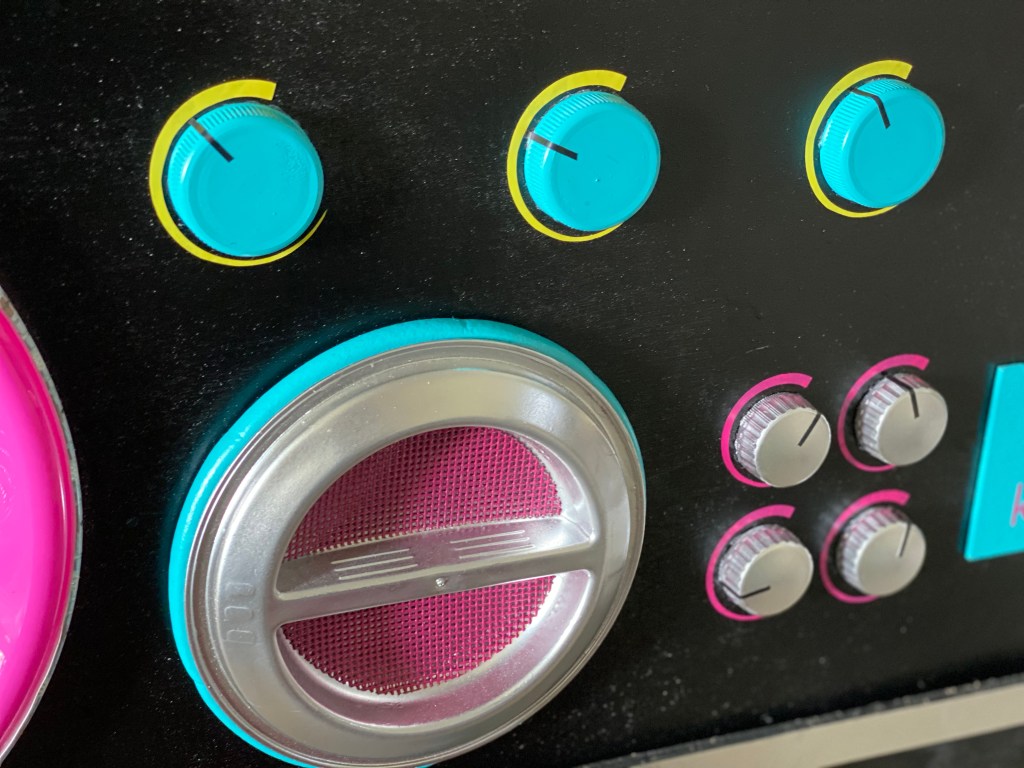
I collected a variety of plastic bottle lids and caps to use as buttons/dials on the boombox and spray painted those as well. I used a primer first as I know spray paint can be very fickle about whether it wants to stay on. It definitely helped, but some of the paint still flaked off at the end. (Note in the picture in the middle below, you can see the “box top” back side a little better with the four struts. So it’s definitely more of an open, two-sided “box” – which was intentional, to reduce material costs/weight and also to give the DJ more space behind the boombox.)


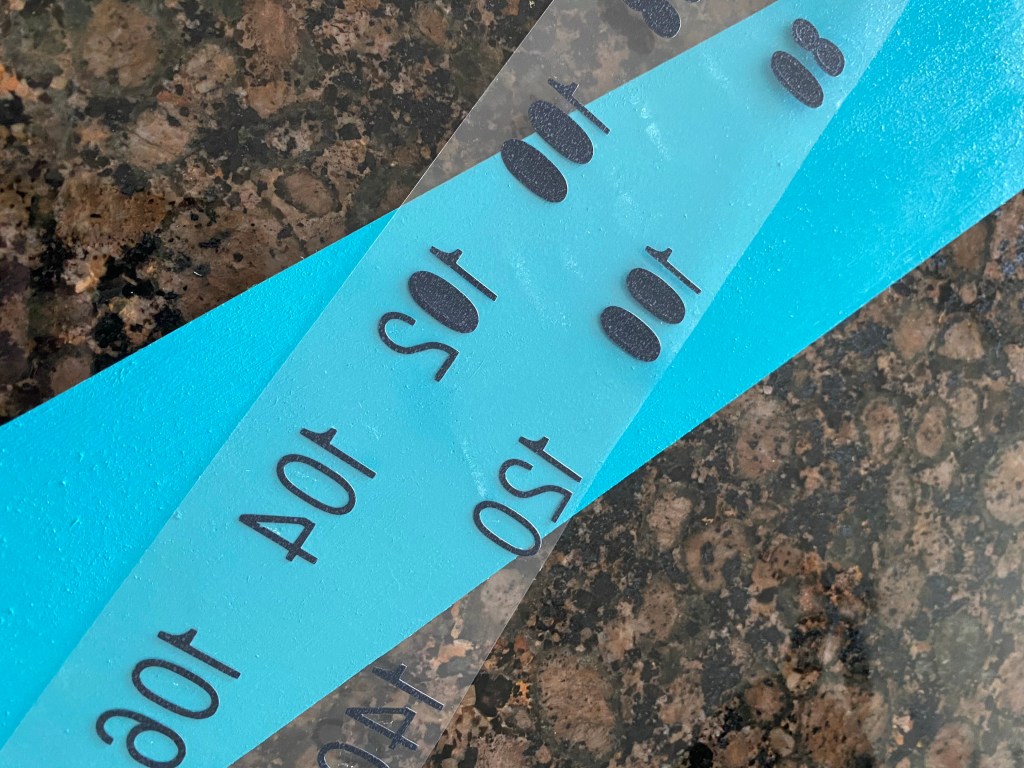
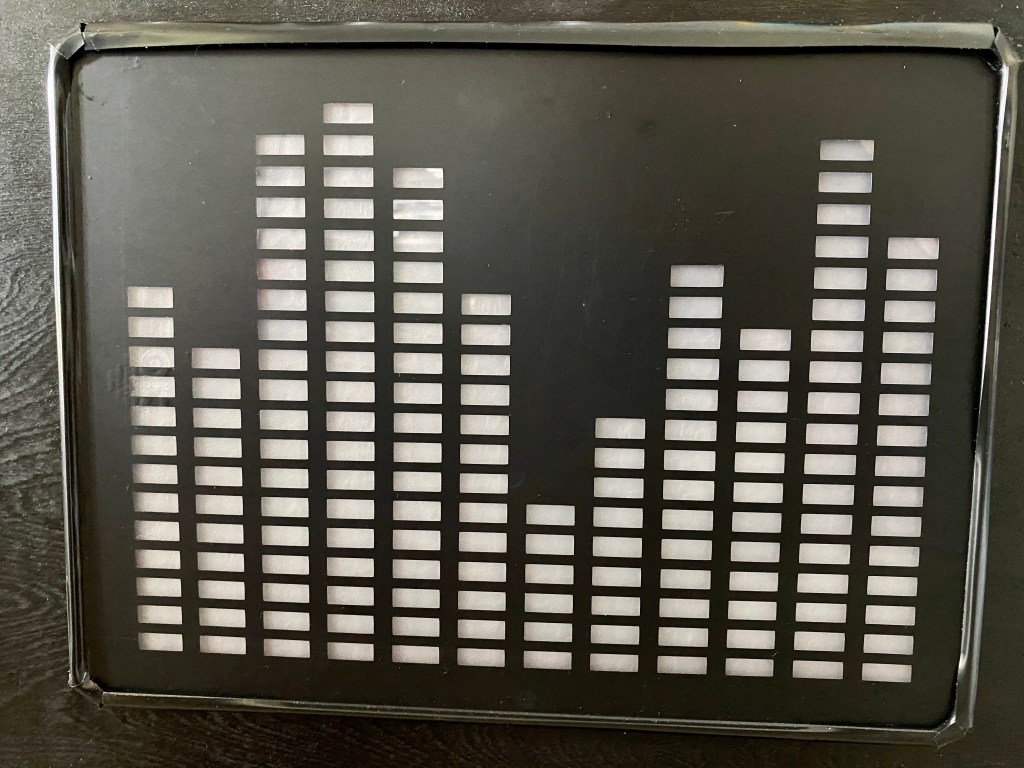
I designed and cut a radio frequency display design using my Cricut Maker. To make the transfer of the vinyl easier, I tried using iron-on HTV instead, and ironed it onto the wood. I’ve used this technique before, but on unpainted wood… so discovered that acrylic paint will melt a bit under high temps. Luckily it didn’t mess up the paint too bad so I didn’t bother redoing it.

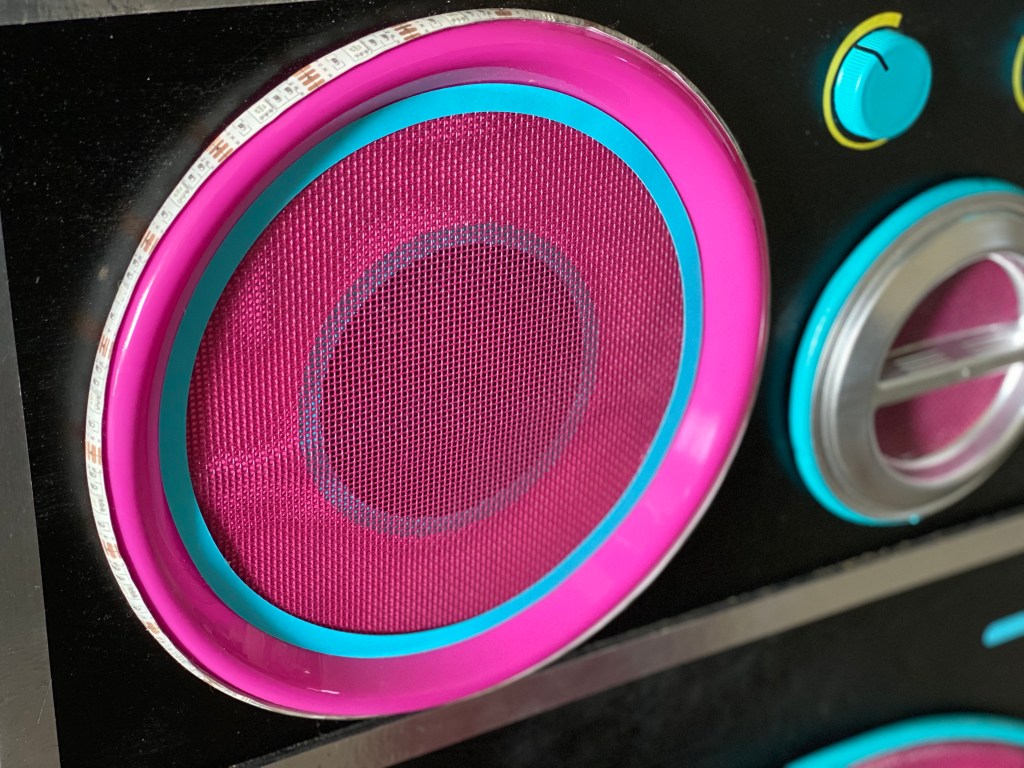
I bought rolls of aluminum tape from Amazon for $2 a roll and used this as chrome-like edging all around the outside of the boombox, and to separate the different sections as well.

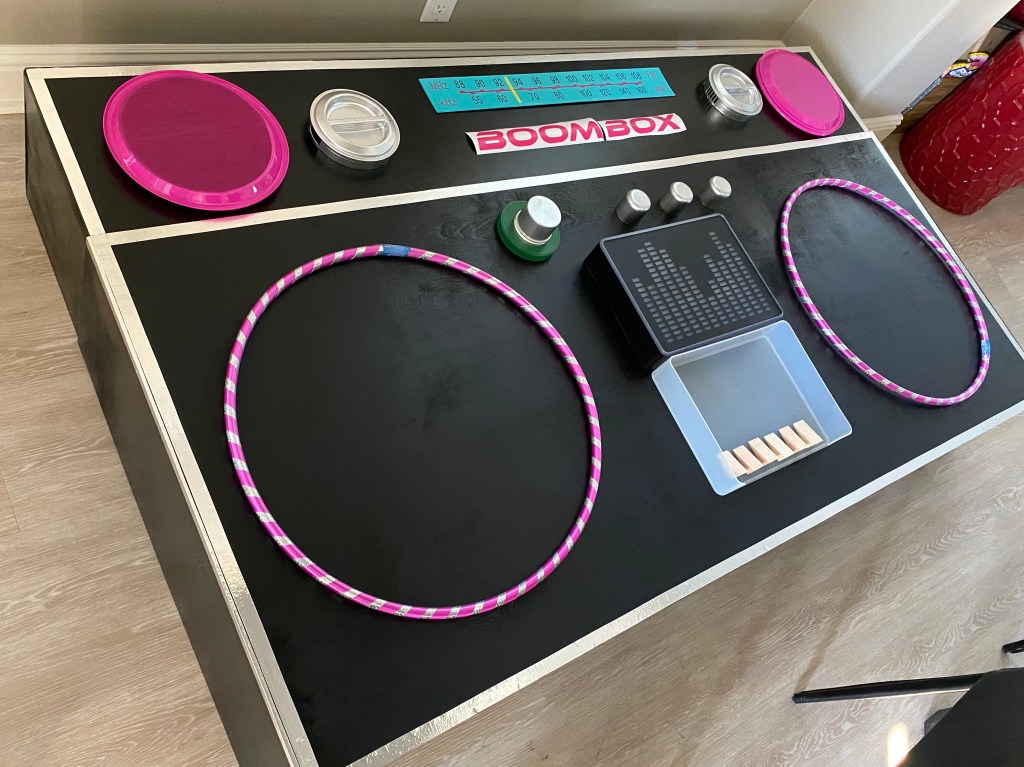
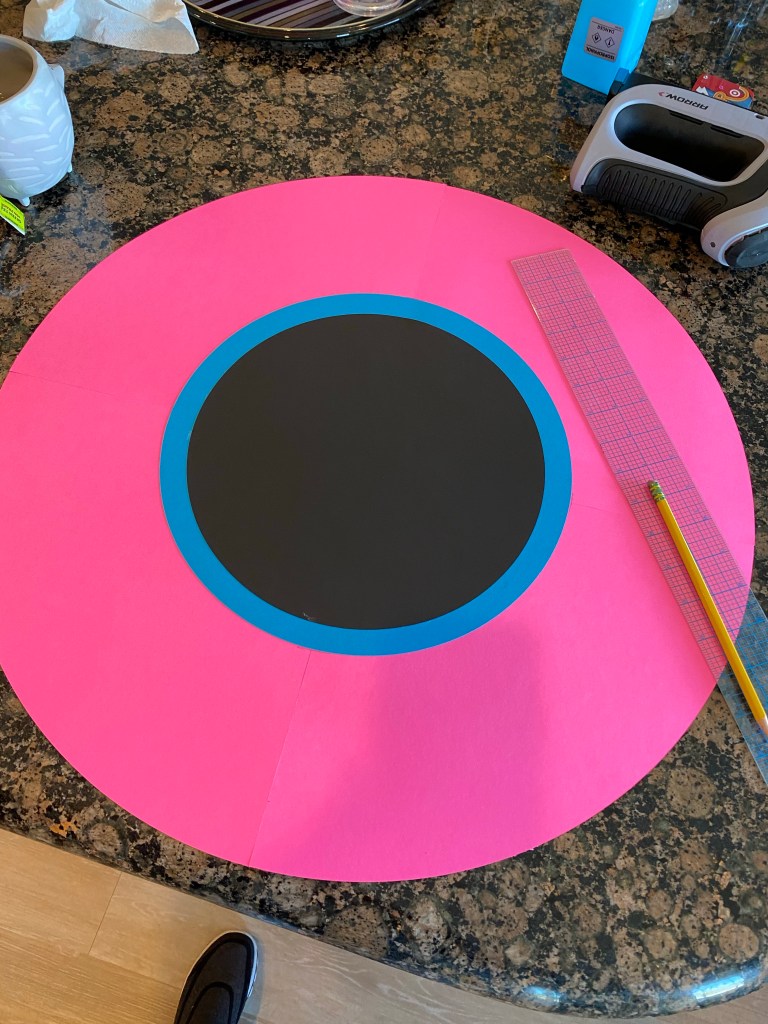
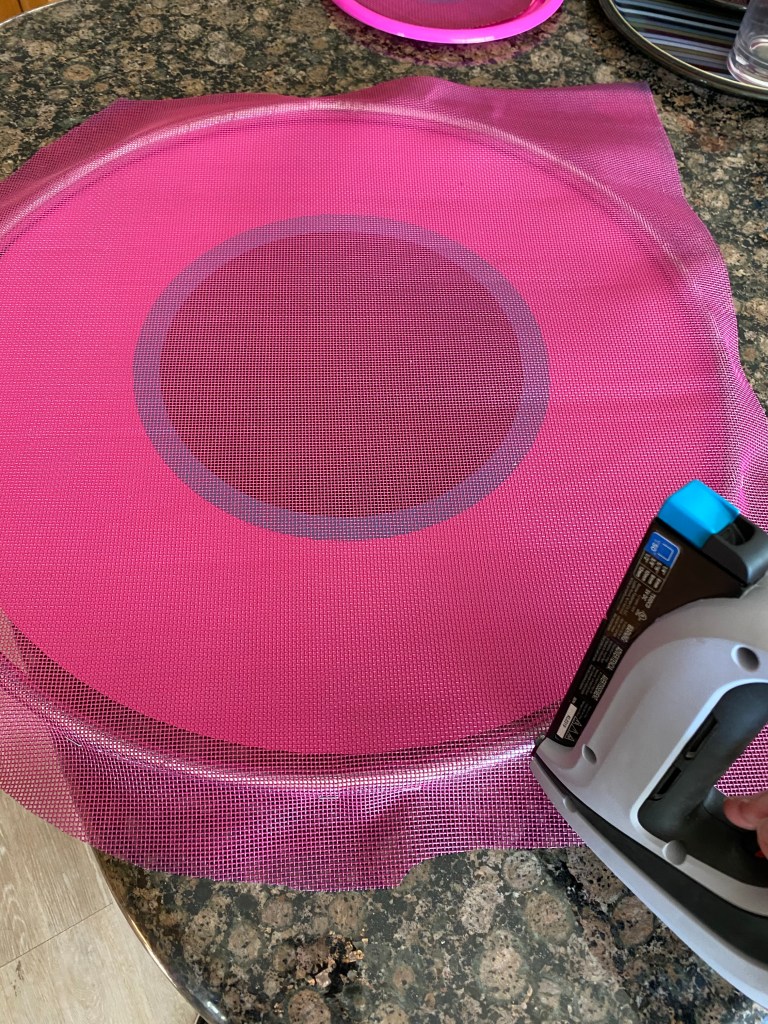
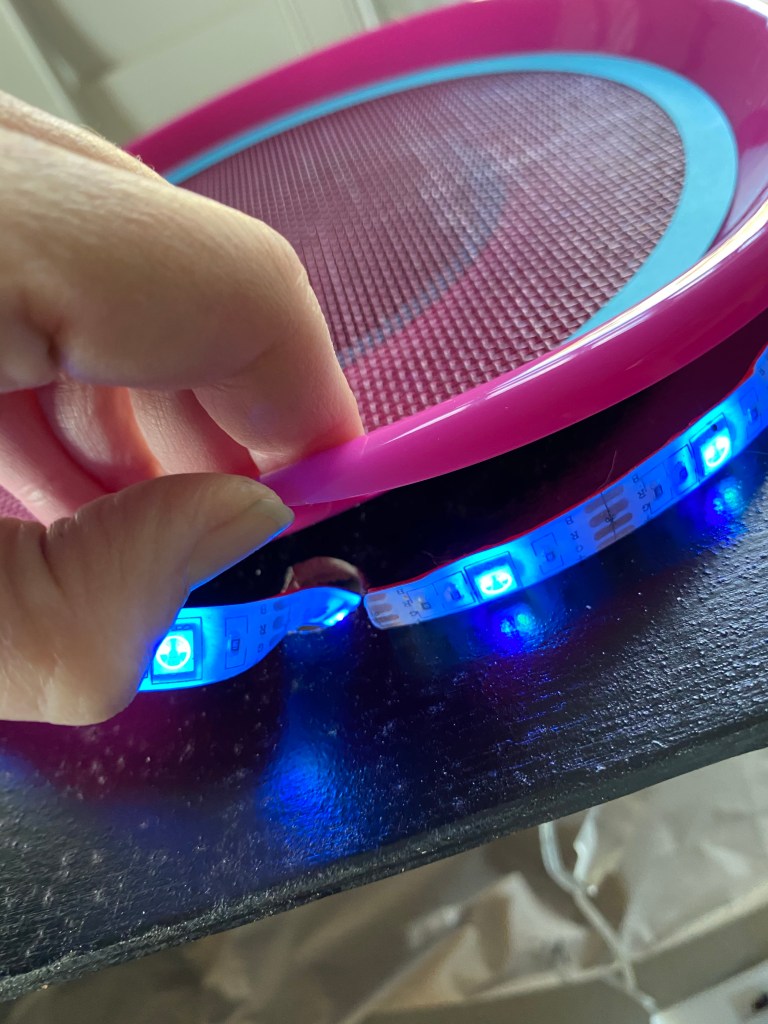
The hula hoops were a perfect size for the large speakers, but I needed to transform them to actually look like speakers. To give definition and the speaker-look underneath the mesh, I created a design out of pink, blue and black card. I found some vinyl mesh at Joann’s and spray painted it pink. I staple gunned the mesh all around the hula hoop making sure there was sufficient tension on it so it wouldn’t sag.


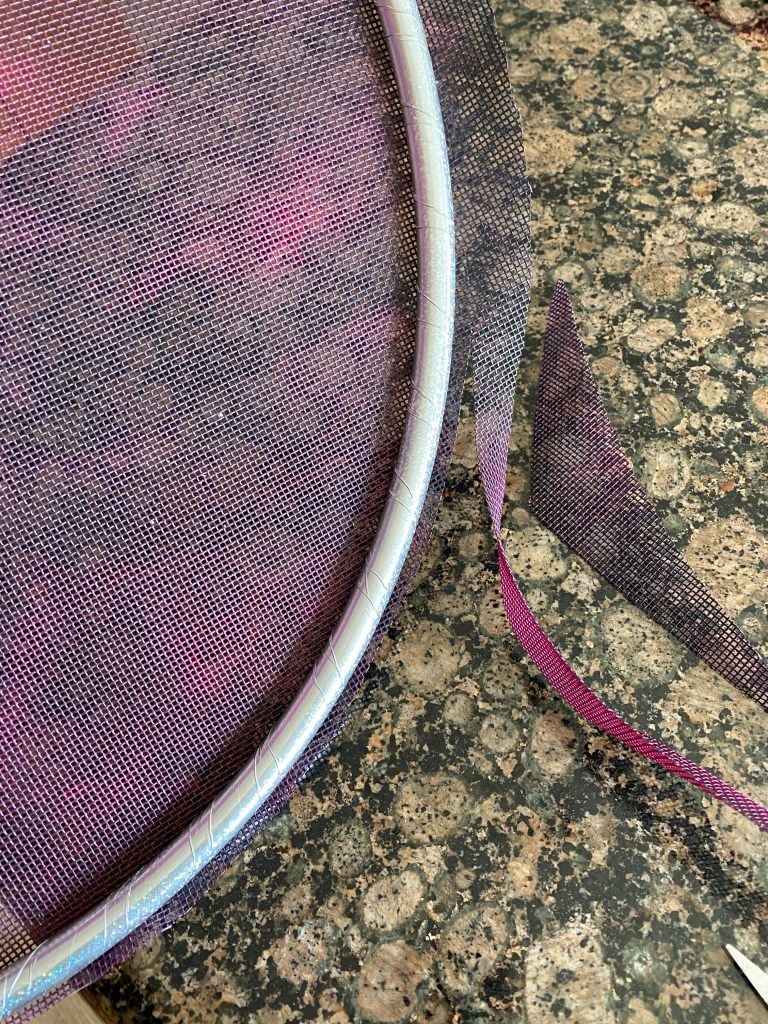
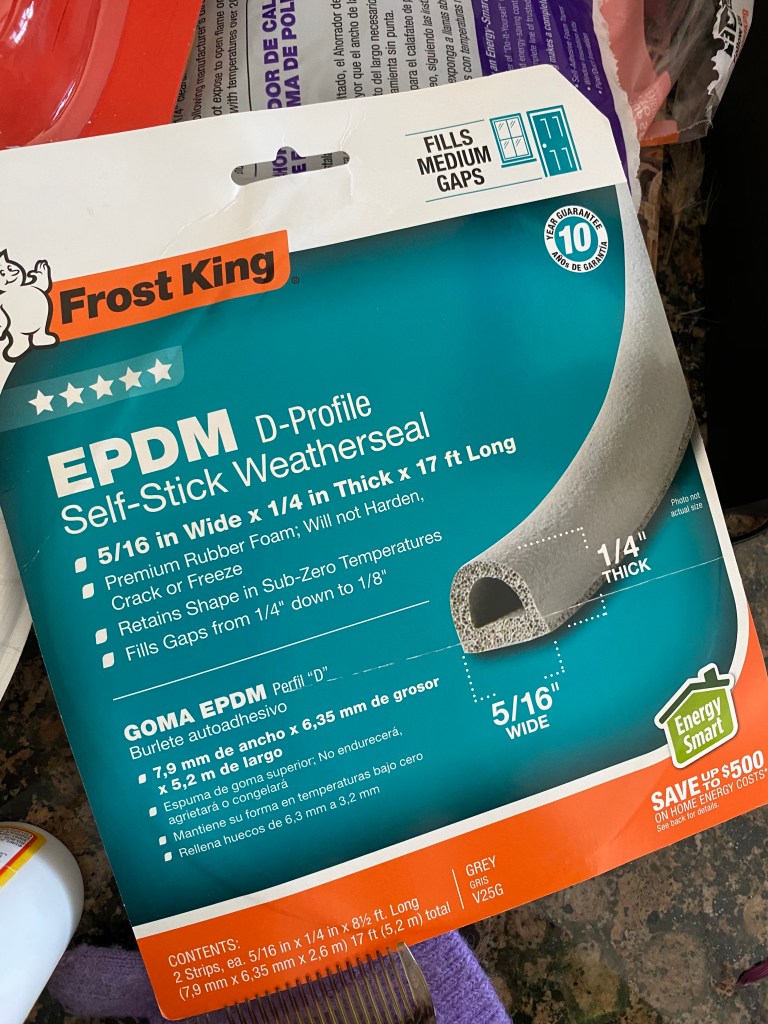
To finish off the speakers, I found weather sealing foam adhesive at Home Depot and spray painted it light blue. I taped it around the hula hoops to hide the staples and also to give some extra dimension. The adhesive wasn’t very strong and couldn’t defy gravity underneath the hoops, so I hot glued the foam in that area.


For the cassette player, I could have made something that looked decent out of card, but being me, I had to go all out and actually 3D print an oversized cassette tape. I found a design online, printed it up, painted it, and then created a custom sticker to make it have that early 80s design that some of us might remember!


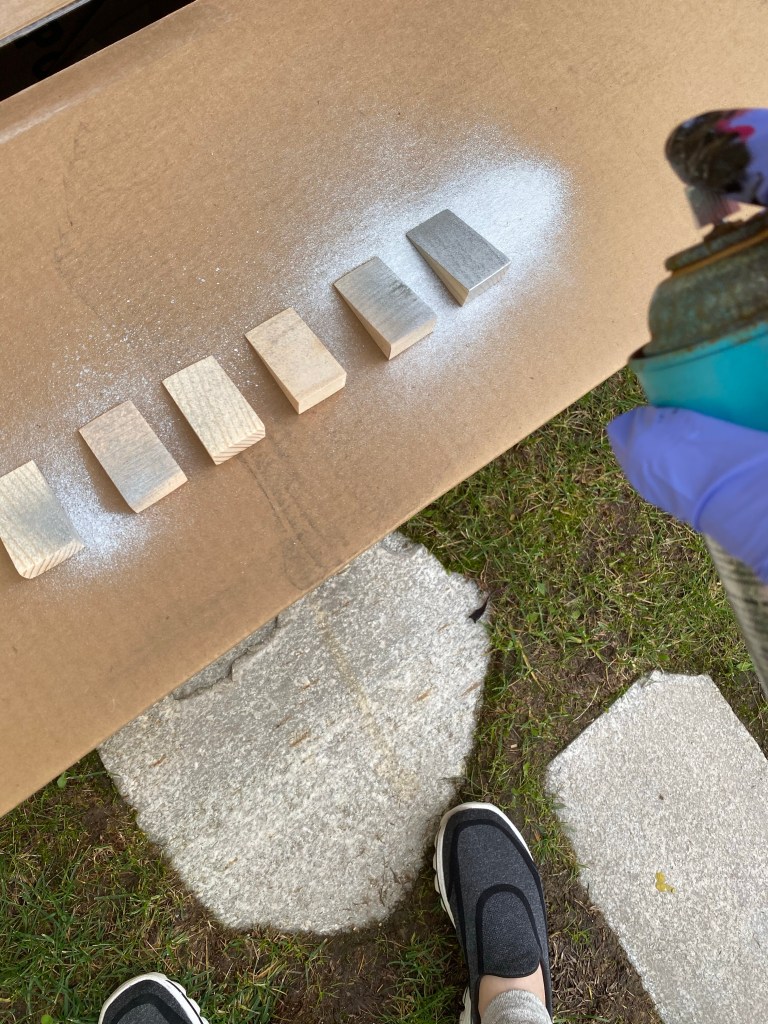
I found plastic paper trays at Target for $5 that were the right dimensions for the tape deck and the equalizer display. I added foam to the inside of the paper tray, and cut a small recessed area for the tape to sit comfortably in. I had my husband cut some small pieces of wood on a diagonal to be the cassette deck buttons and spray painted them silver. The paint showed through the wood grain really strongly, so I ended up covering them in silver foil vinyl instead to get a more authentic metallic look. I covered the top of the paper tray with a thin, transparent sheet of acrylic, and added black and silver vinyl to it so the only see-through section was where you could see the cassette.


The equalizer was actually one of the first things I made for this project, using the same paper tray as the cassette deck. I designed a black vinyl cut-out to go on the base of the paper tray, which looks like the equalizer light displays (or kind of like skyscrapers). I found some Christmas LED lights that change color independently in a gradual way that could give the illusion of the equalizer bars moving up and down (even through they are static). I taped on a layer of press ‘n seal plastic food wrap to the paper tray to make it a little more opaque, and added a few layers of bubble wrap to help diffuse the light even more, as well as to provide a cushion for the Christmas lights. I cut out a cardboard backing to tape the lights onto and then just kind of squished and taped it all up in place. The effect worked well and was one of the aspects of the boombox I liked the most, but if I were to go it again I’d probably glue things in place instead of the tape, as it’s a hot mess in there!


My original plan was to glue the equilizer and the cassette deck onto the wood, but realized that they stuck out too much compared to the speakers and it didn’t look as authentic as I wanted. So I had the Hubby cut out two rectangles so I could recess both of the boxes. This step was kind of a big bummer, as I ended up with sawdust all over everything, and the aluminum tape got a bit messed up, but it was SO worth doing as it made the boombox look so much better.

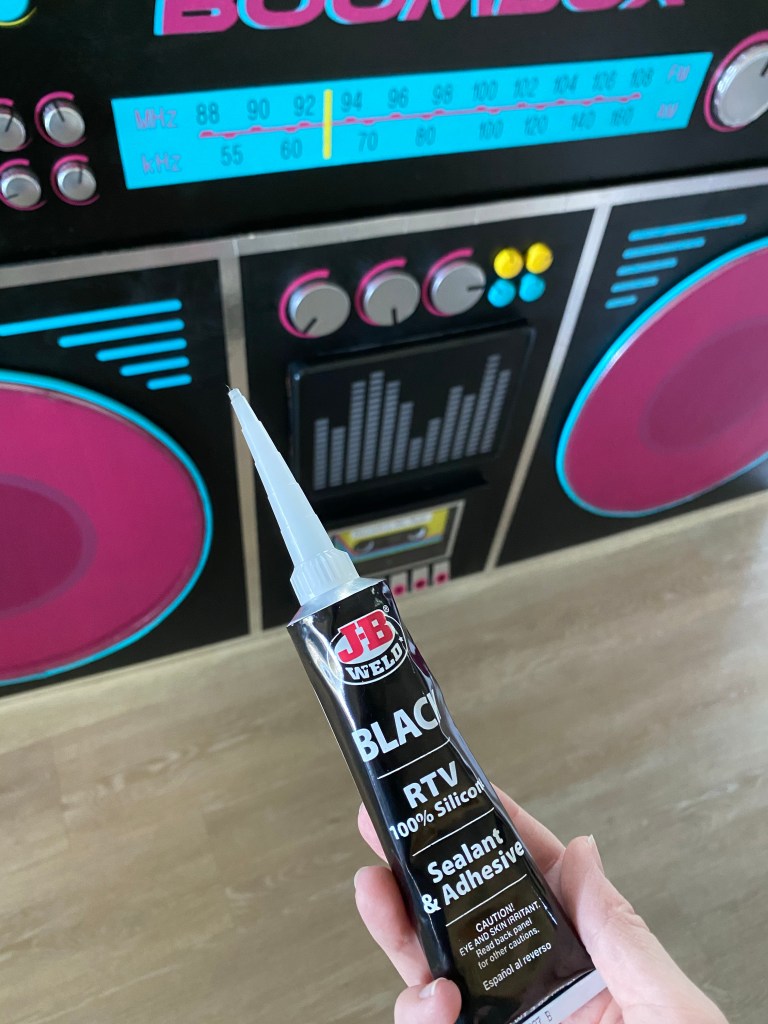
For the finishing touches, I added a “boombox” sign, glued on the knobs and dials with hot glue, and added black sealer around the edges of the cassette and equalizer boxes. I added LED lights around the top speakers, with a small hole drilled just behind the edges of the plastic plates so I could keep the battery packs back there. I added grill marks on either side of the speakers and on the side of the facade. I also cut out little semi-circular dial indicators to stick on around each dial.


And voila: here is the finished product in my living room!


Here it is with some of the 80s decorations I made for the party:

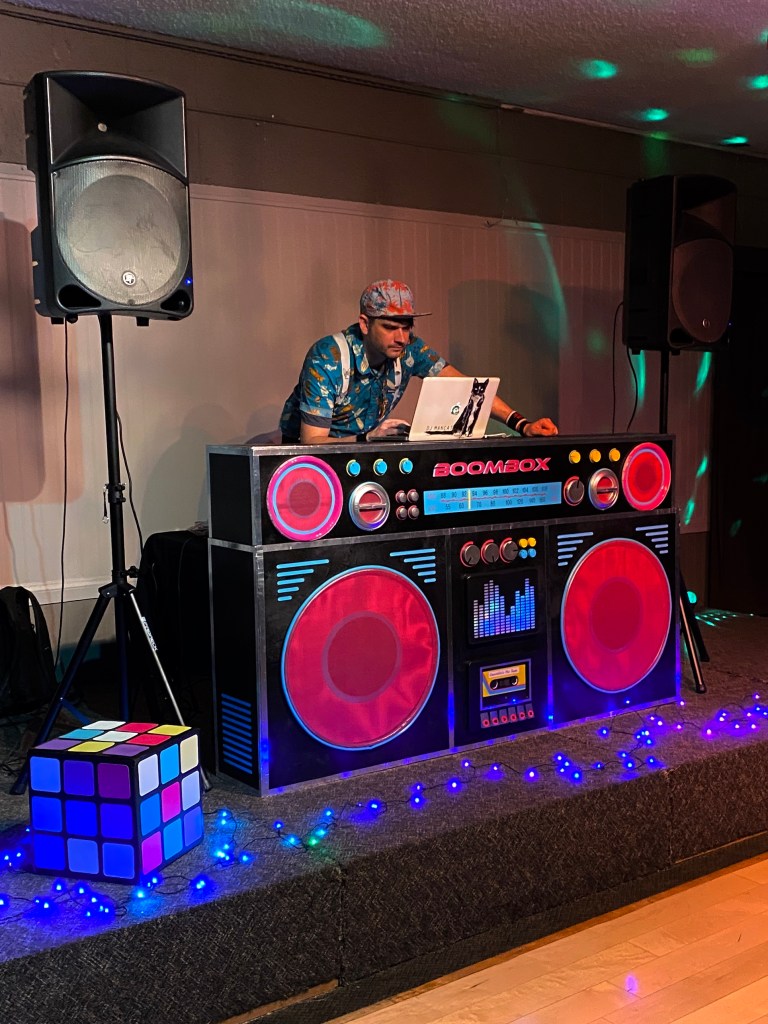
Finally, here is the boombox out in the “wild” as the DJ booth at my friend’s 40th birthday party.

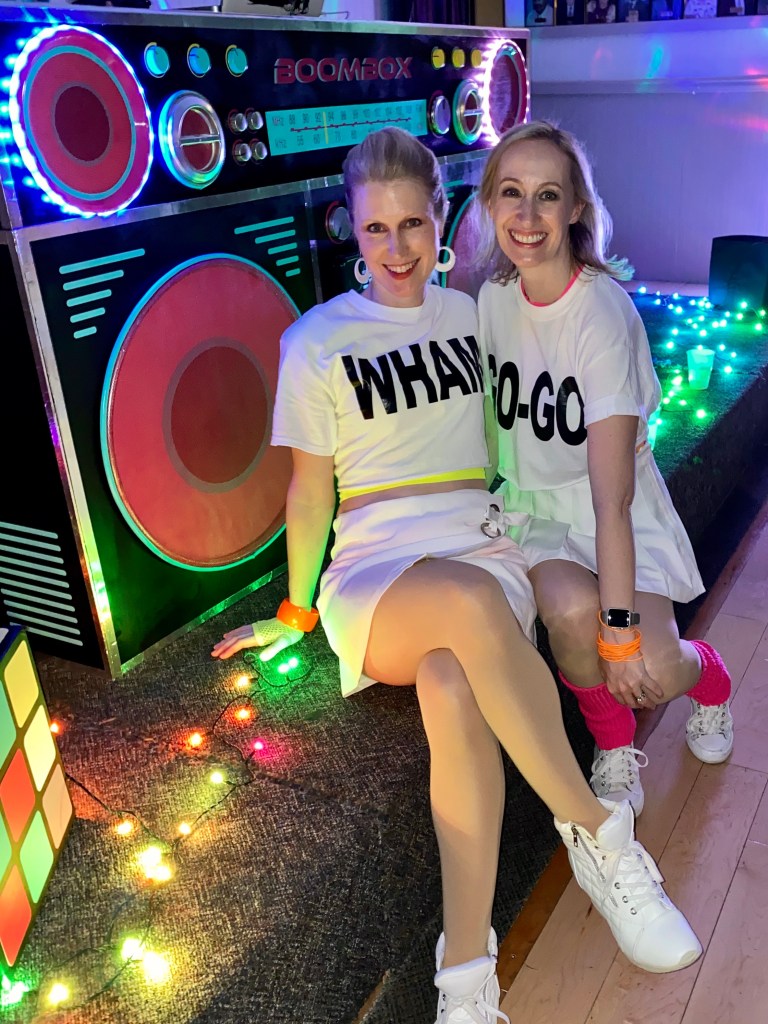


Here’s a peek at some of the other 80s decorations I made for the party:


I was really happy overall with this project and was pretty psyched when I had quite a few folks asking whether they could rent this for their own parties! As of right now, it’s sitting in my dining room, and my 7 year old enjoys having dance parties next to it… but I know sometime soon we’ll have to retire it to the garage to make space for the next crazy project I take on!
