The premier of Season 8 of Game of Thrones felt a little like my birthday – after months of anticipation, the day finally arrived, we had an awesome group of friends over to celebrate, there were decorations, a lot of wine and a huge cake… and a few too many candles. My previous blog post outlined all the decorations I hand made for the party, but I just wanted to share some of the details of the actual dinner party.
The Cake
The most important part of any celebration, right? This was a custom order at Lazy Acres, a local grocery store where they have an awesome bakery. Only the baker I was working with had never seen Game of Thrones and therefore was utterly confused when I was trying to explain what I wanted the cake to look like (“you really want it blood colored?”). I was really thrilled with how it turned out – it’s a chocolate cake underneath the white icing and it tasted delicious.
The food
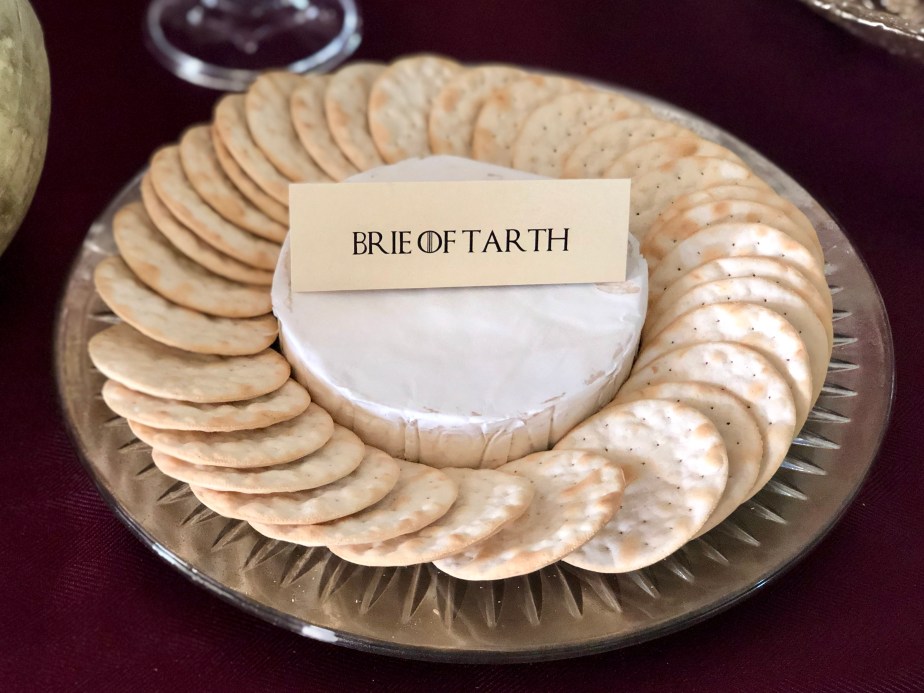
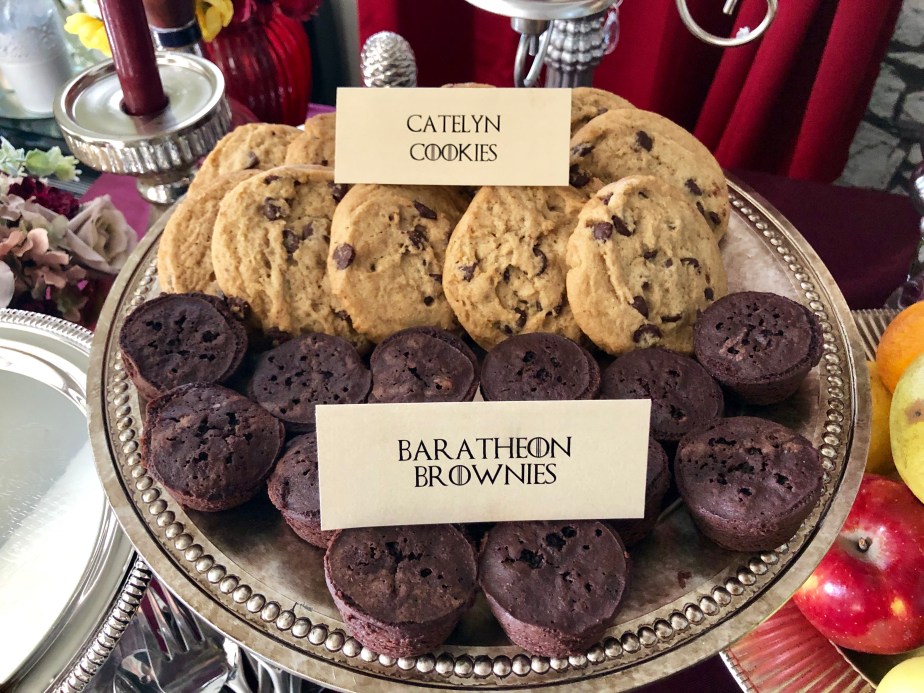
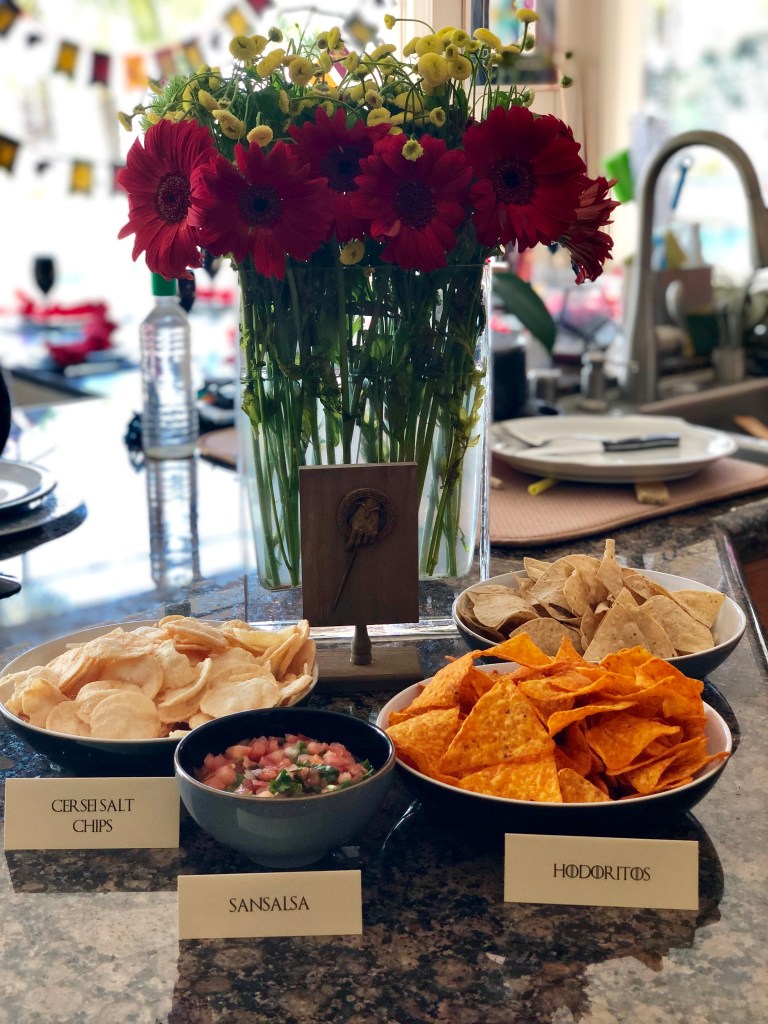
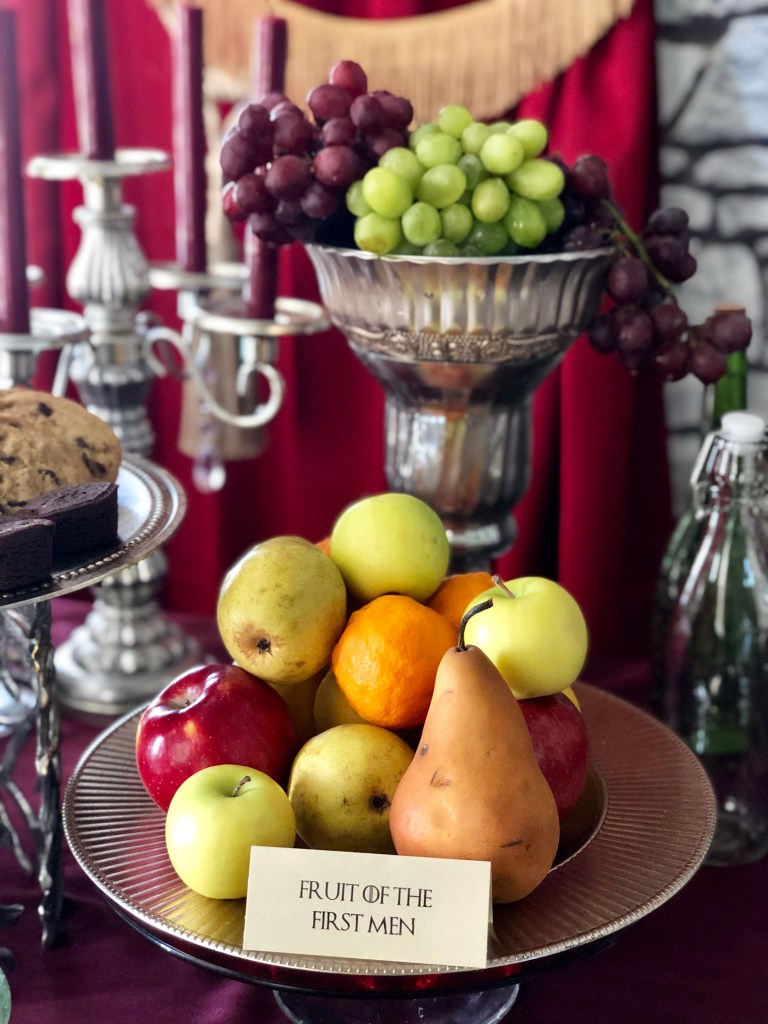
I stole a lot of ideas from Pinterest for Game of Thrones inspired food (e.g. Sansalsa) but came up with a couple myself (Brie of Tarth being my favorite). I printed out name cards for the food using a GOT font. I was really pleased with myself for being so witty and then realized the next day that I had a typo on one of them, so the Army of the Unsullied for the Amy of the Unsullied, which makes no sense as the Unsullied don’t really to get to have an Amy, given their lack of relevant body parts. Also the “Theon Greyjoy Special” was funnier and less gross in my head than when actually seeing it on the plate. Anyway, here is some of what I came up with (I also had some Dorne Drumsticks to go with the Medieval feast idea, plus Reagarlic bread, Podrick potatoes etc.):
The Table Setting
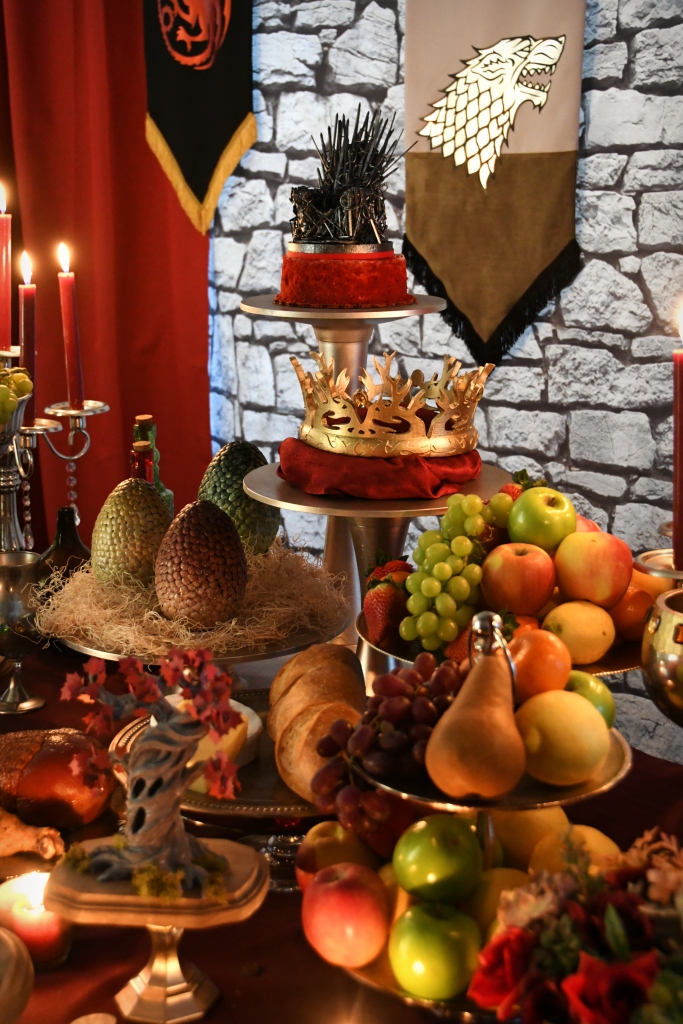
I attached my house sigil banners to the window by the dining table. The centerpiece was made out of a sword and an axe. (Everyone has those kind of things lying around their house, right? The axe was my mother-in-law’s that we inherited, and the sword we 3D printed). I added touches of red with the napkins and the roses and used medieval-style wine globlets.
Little Extras
I cut out this sign for my bathroom using my Cricut and removable black vinyl. I definitely got a chuckle out of my guests. I haven’t taken it down yet as I still get a kick out of it, and it actually serves a purpose!
The final table set-up
I was so pleased with how the final table looked, particularly later at night when it was lit just by candlelight. I was so sad to dismantle it all… but I’m thinking it might be worth redoing in a couple weeks for the finale!
I’m so excited about the upcoming finale season of Game of Thrones and plan on throwing a few parties (definitely for the premiere and final episodes but maybe it’s a good excuse for six consecutive Sunday gatherings!). This past week I made a number of decorations and over the weekend I did a dry run of my table for the party (because that’s entirely normal to dry run a party table set-up, right????). Anyway, here are the details on some of the decorations I hand made:
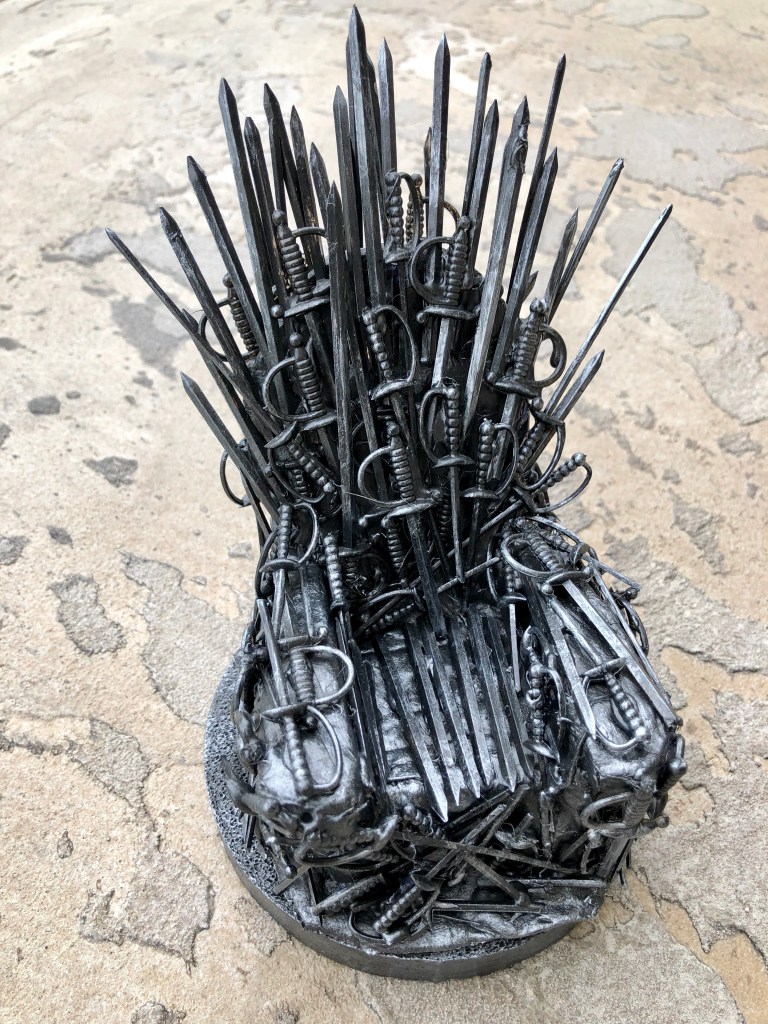
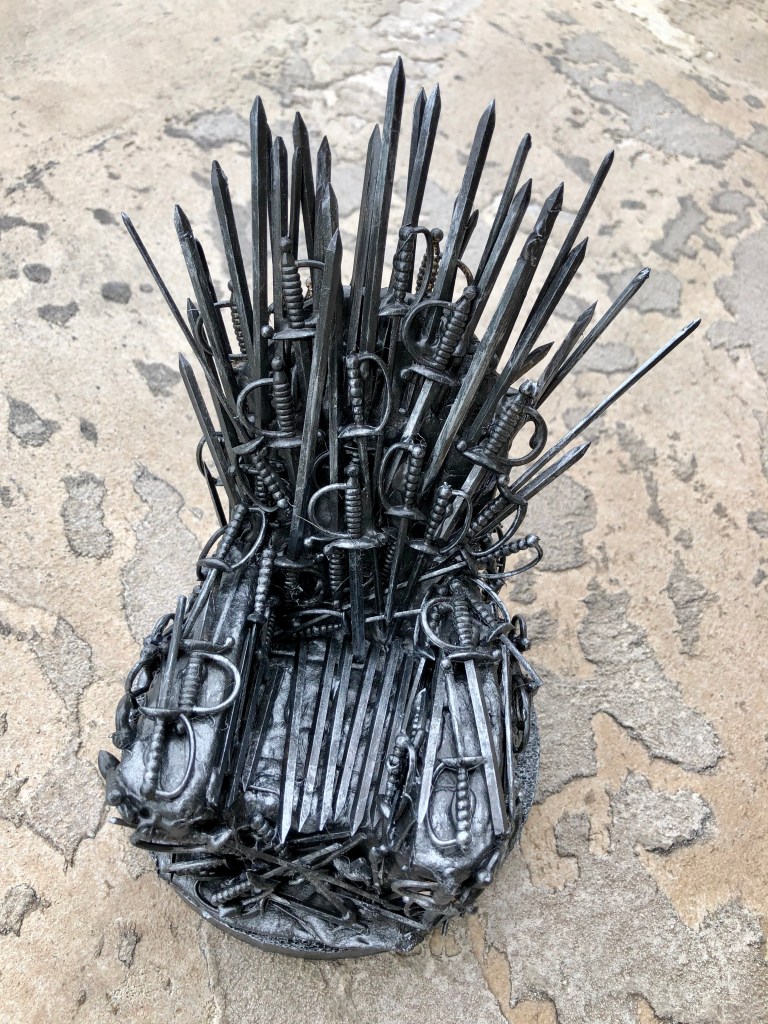
Iron Throne
This item I actually made last year and annoyingly didn’t take any photos of the process. In short, I took one of those cheap wooden Adirondack chairs that you can buy at craft stores to use as my base, then I added air-drying clay around the chair to make a solid base. I found a small round foam base to put the chair on. Then I picked up a packet of plastic cocktail spears to use as the swords to cover the throne with. I used a hot glue gun to glue the spears on around the throne (some have to be cut shorter to fit on the desired area, and others have to be poked into the foam base). Finally I painted the entire thing with gunmetal colored craft paint, and added some small touches of light silver in places to make it catch the light and have more dimension and aged look. For the party I plan to use it as a cake topper. For the dry run I put it on top of a small red velvet cake but for the real party I will have a local baker make me a large cake with red drip icing to look like blood dripping down from the throne. Dark.
While this is technically hand made, I 3-D printed it, so a lot of the credit needs to go to the designer (you can find the pattern at https://www.thingiverse.com/thing:87469). It printed in 4 quarters, which I glued together with a clever clamping method (credit to my husband for that). Once it was sanded, I gave it a spray paint with a couple coatings of gold metallic paint, following by a light dusting of champagne gold paint to give it some dimension. I finished it off by sticking on 4 “jewels”.
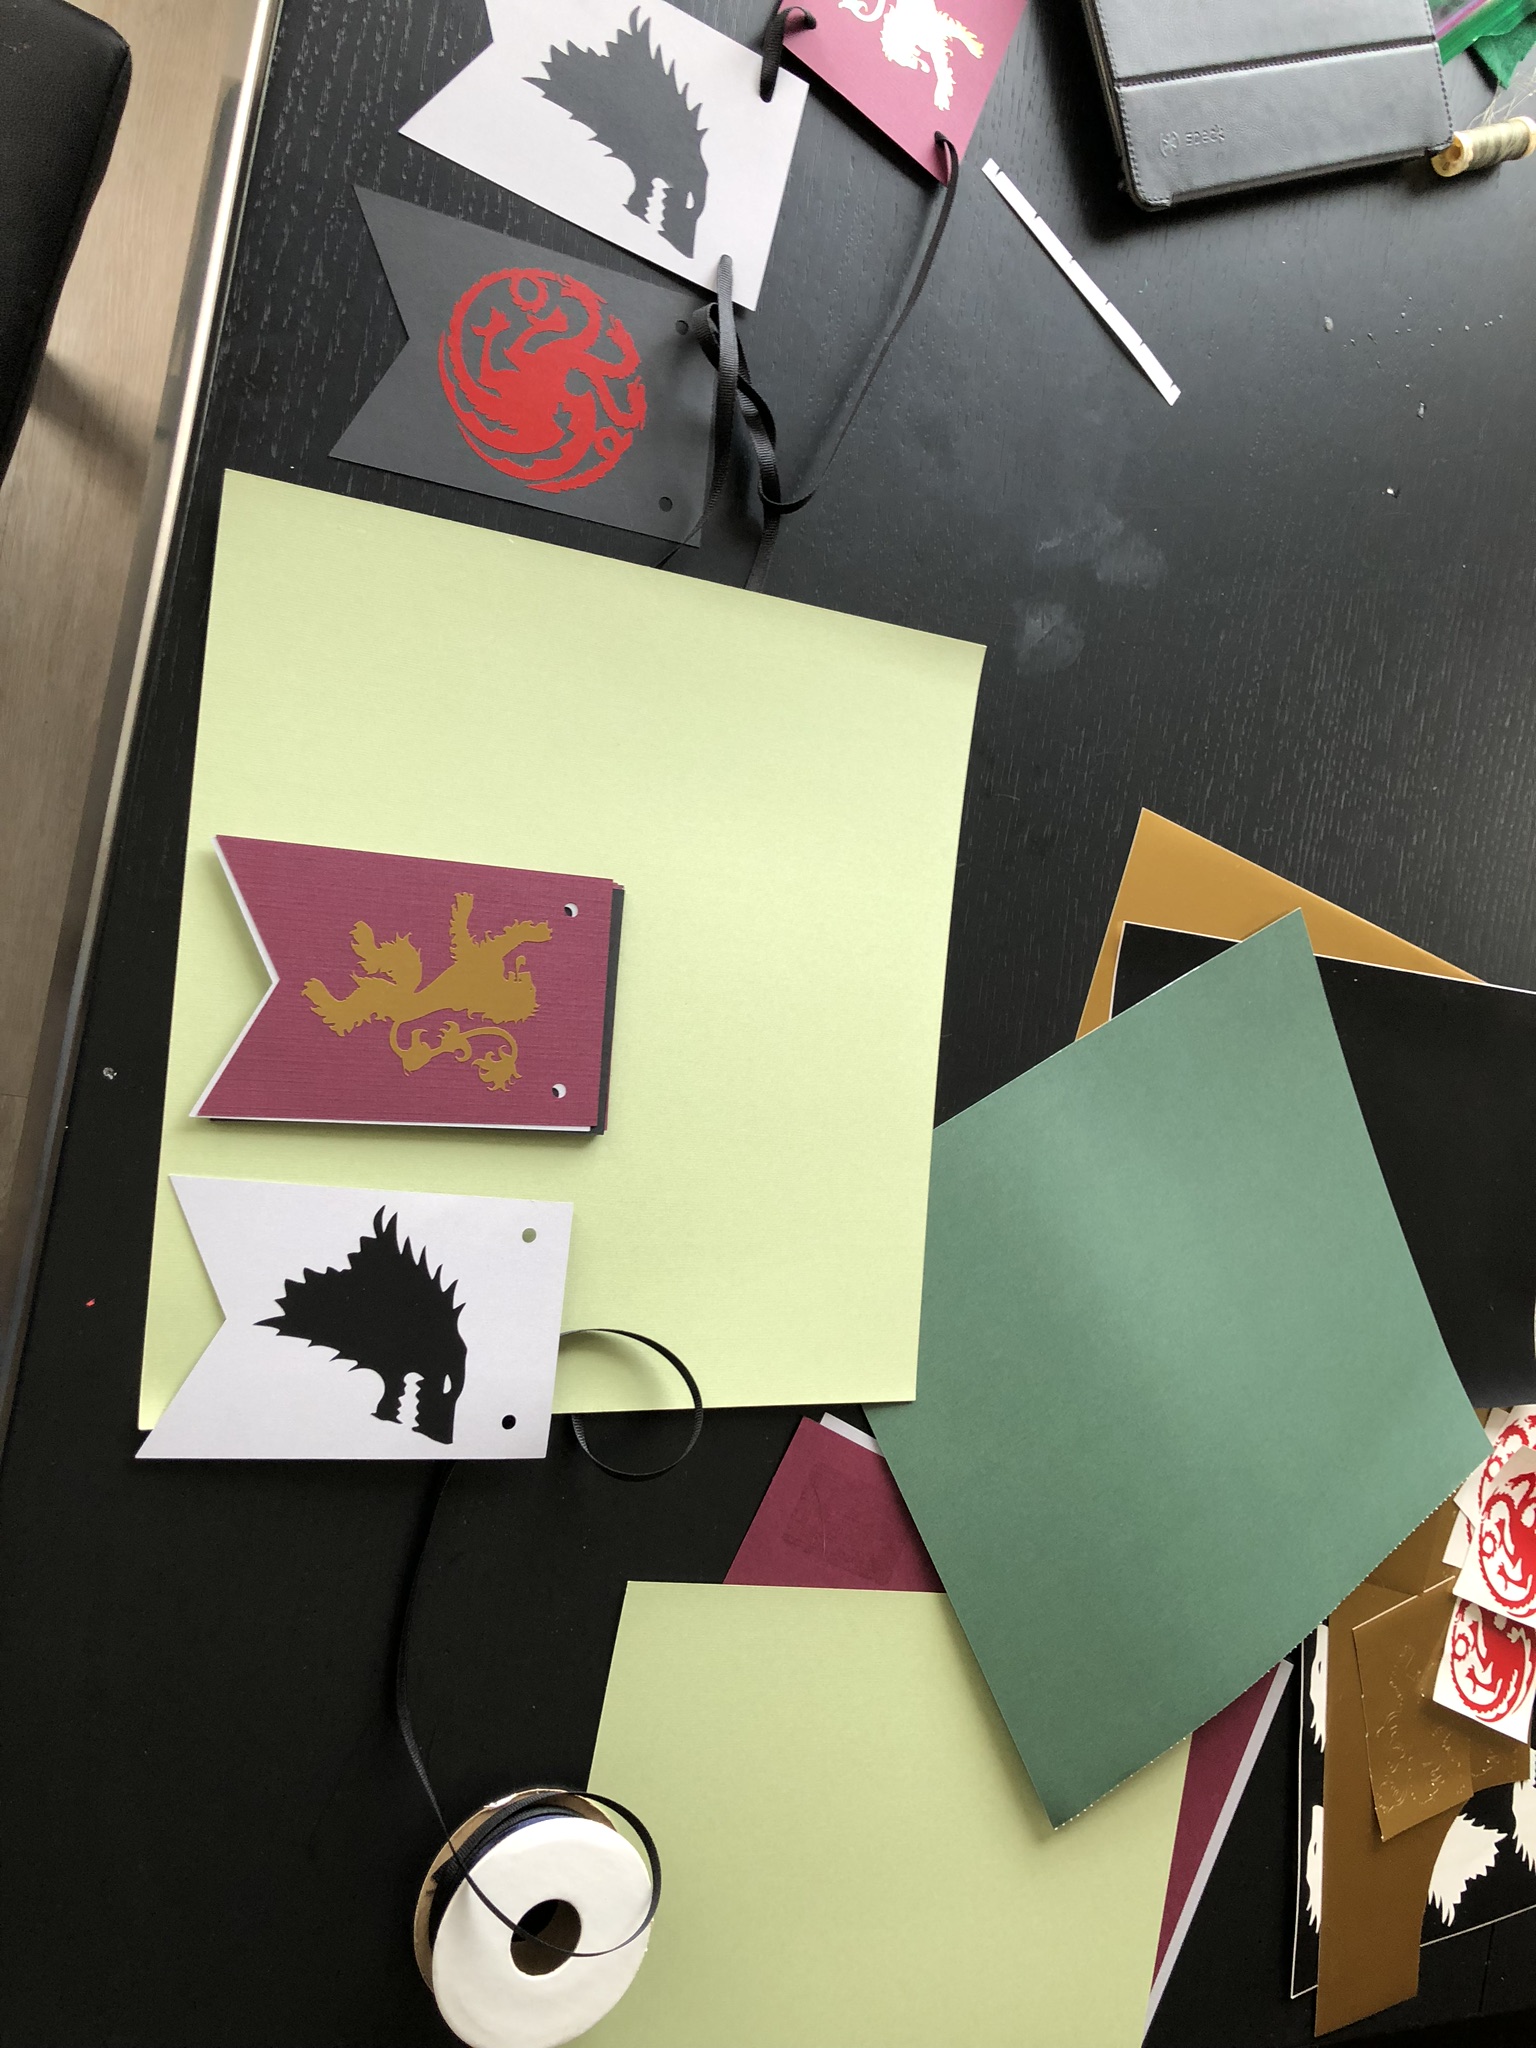
House Sigil Banners (of the small card/vinyl variety)
I made these using my handy dandy cricut cutting machine. I researched the different house signs and picked ones that either worked with the current plot (Starks vs. Lannisters vs. Targaryans) or ones frankly that fit the color scheme despite not being quite so central to the story right now (Greyjoy, Baratheon and Tyrell). You can purchase SVG cutting files of all the house sigils on sites like Etsy for a few dollars but I was feeling cheap and also wanted the satisfaction of entirely self-serving, so I just googled around to find free clipart to import into Cricut Design Space. I cut out the banners with medium card stock in the house colors (more of less!) and then cut out the sigil shapes with vinyl so I could simply stick them onto the card without having to mess around with glue. To finish up, I decided on the best order to spread out the bright and dark colored banners, and thread them all onto ribbon. I hung the banners on the top of my backdrop and also on the front of the table (pinning them to the tablecloth).
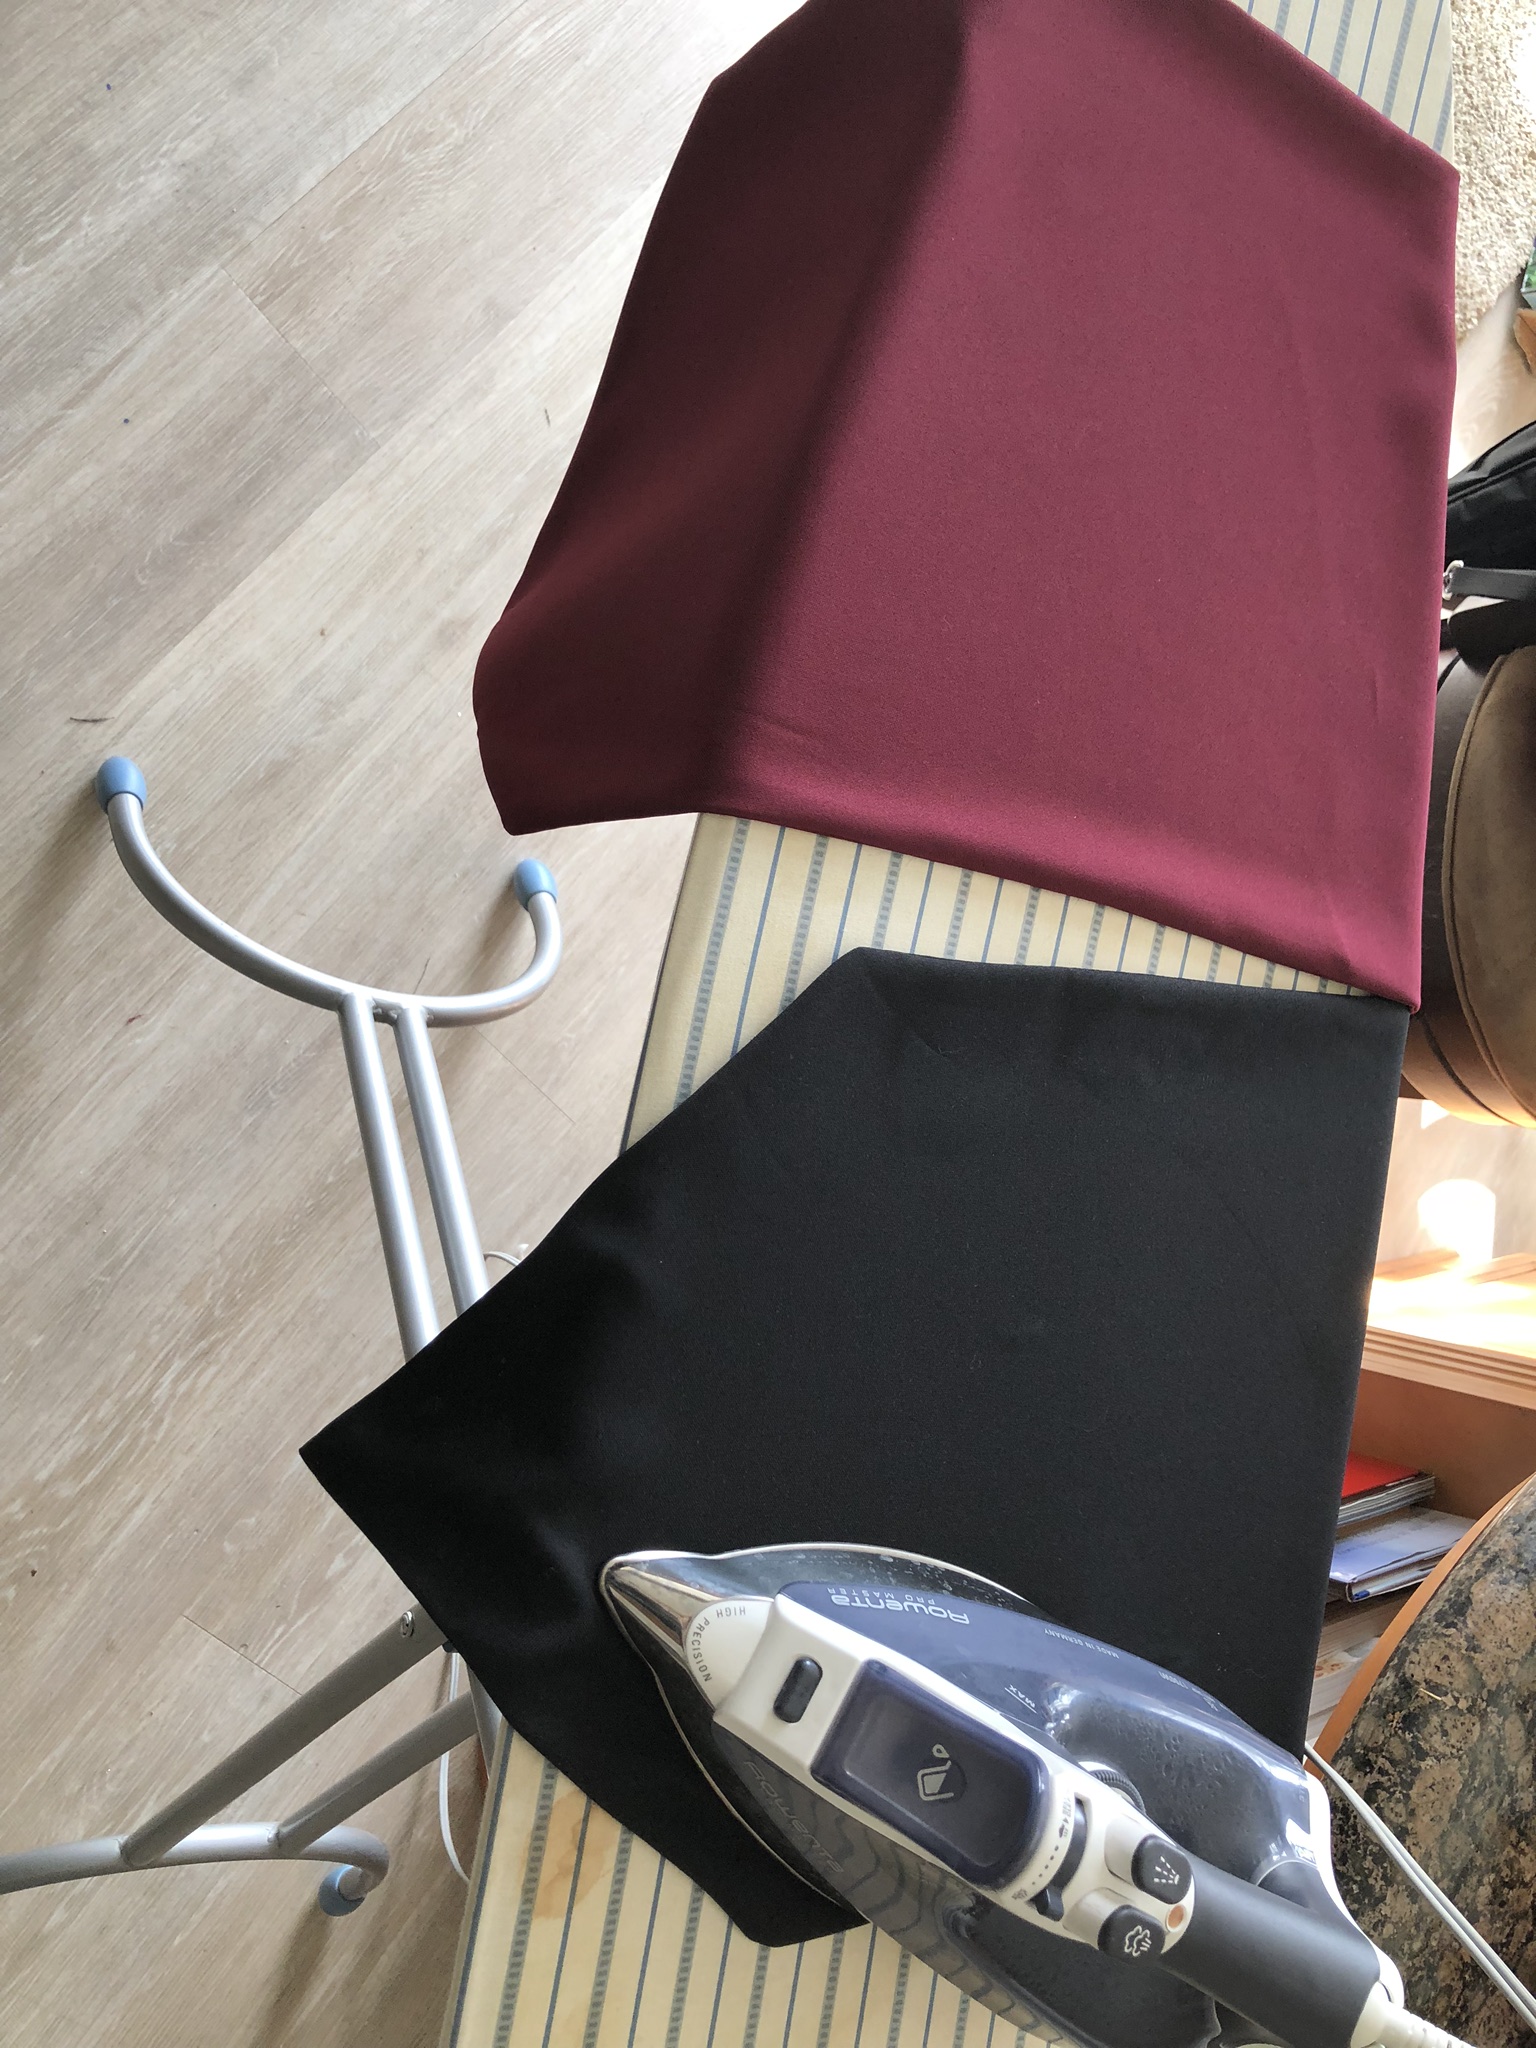
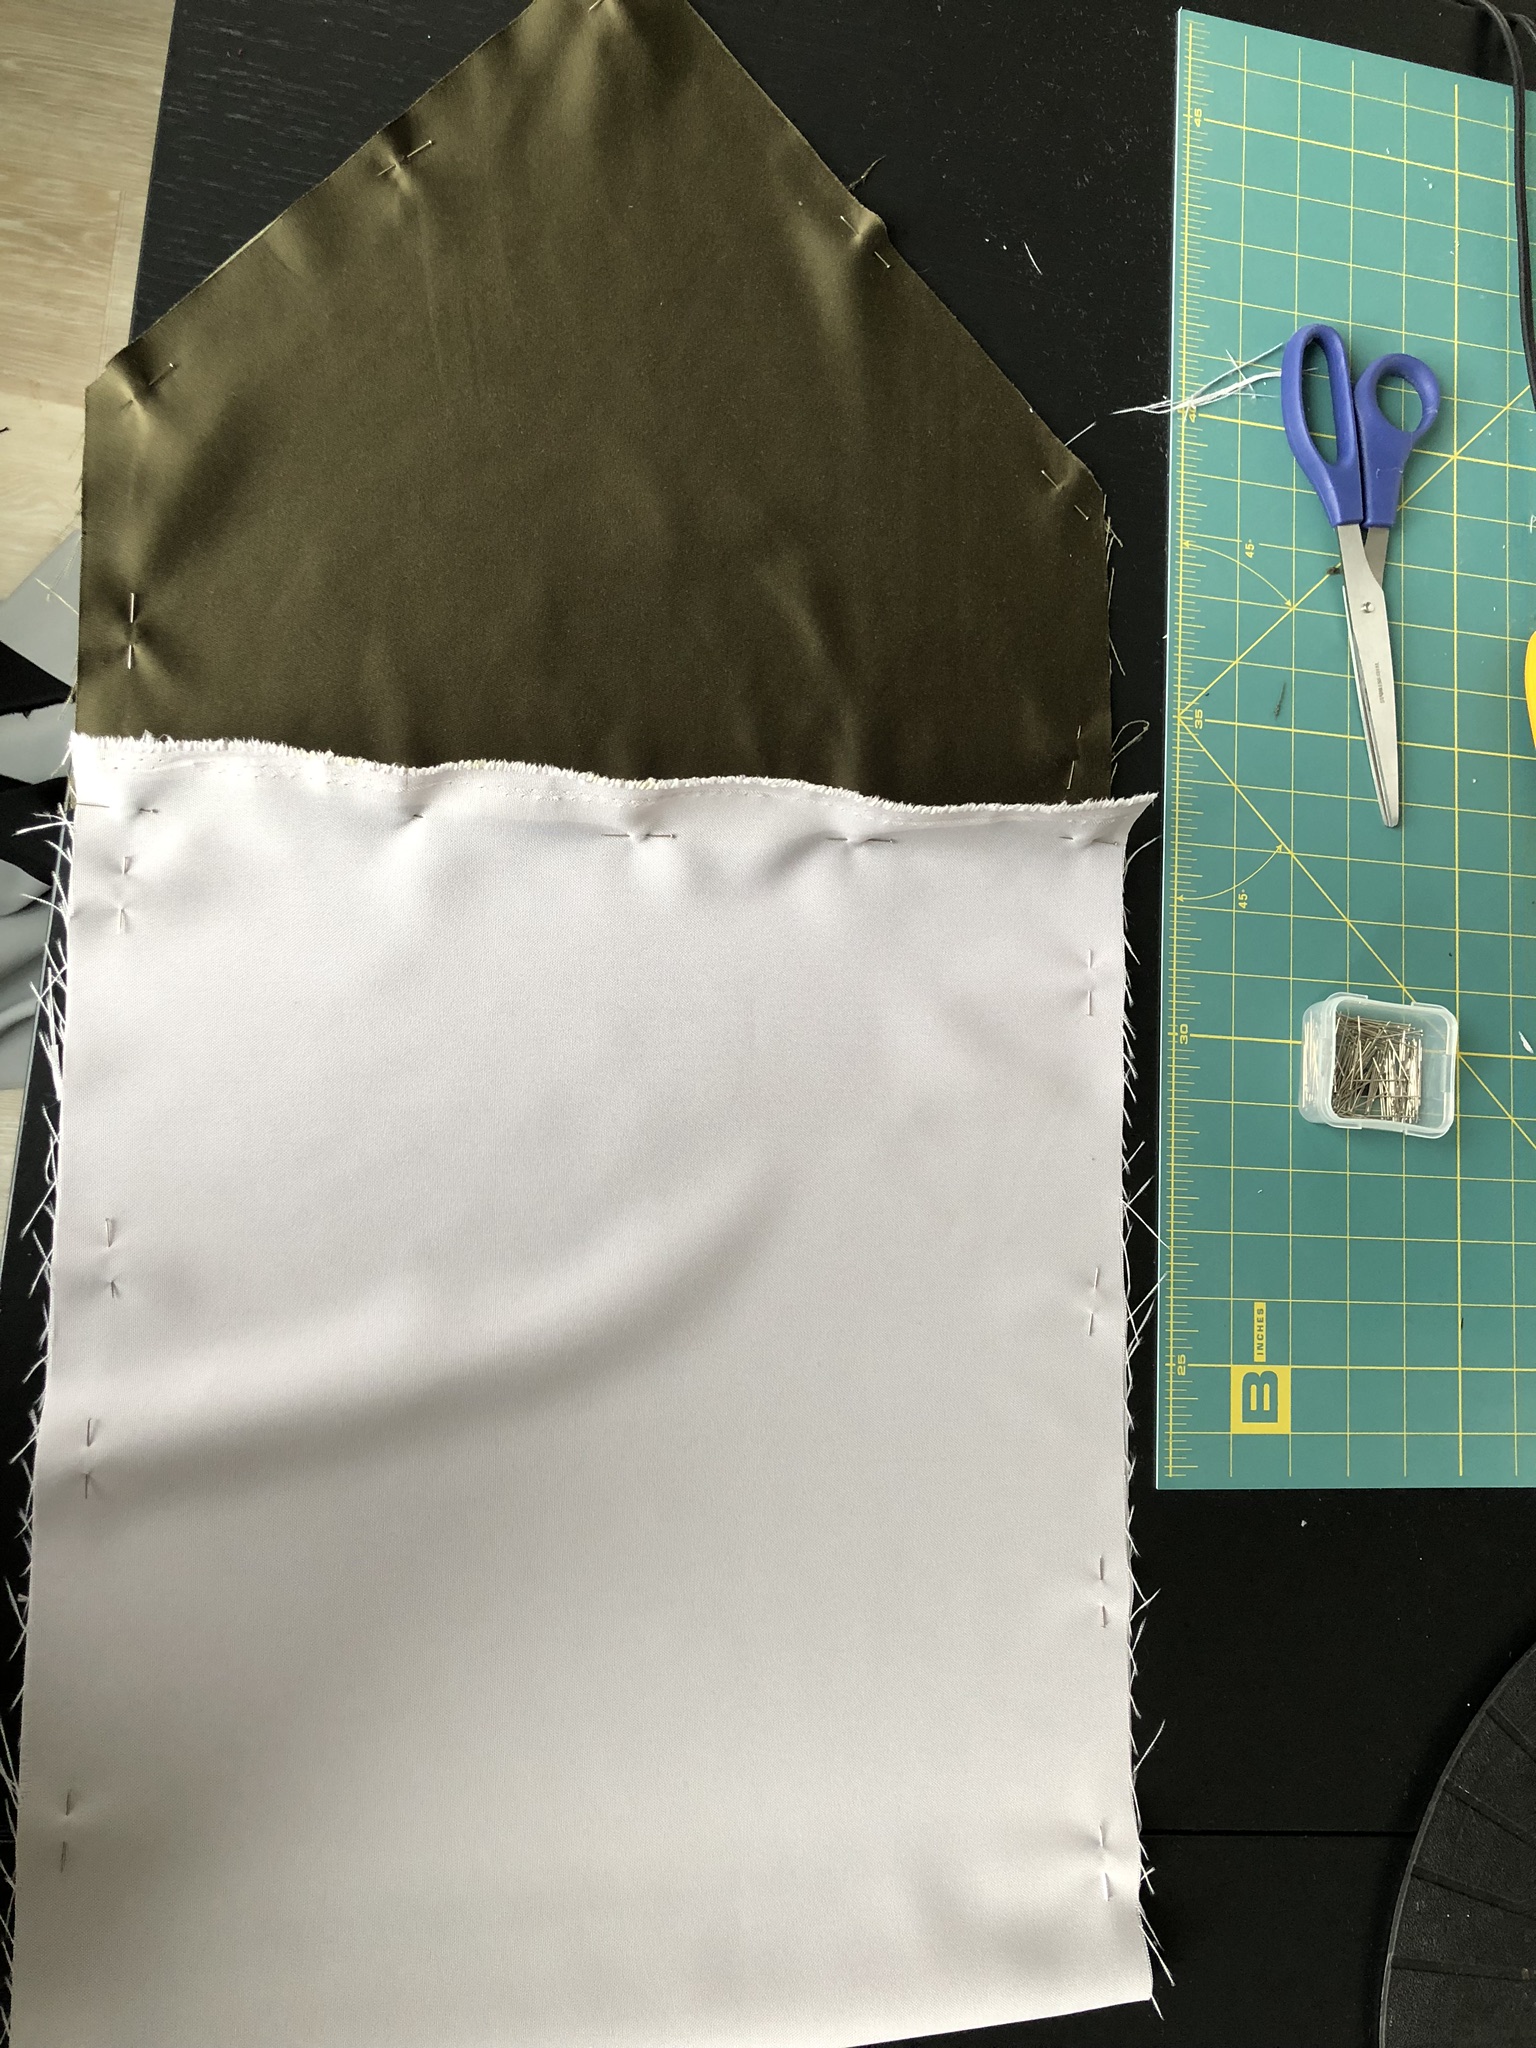
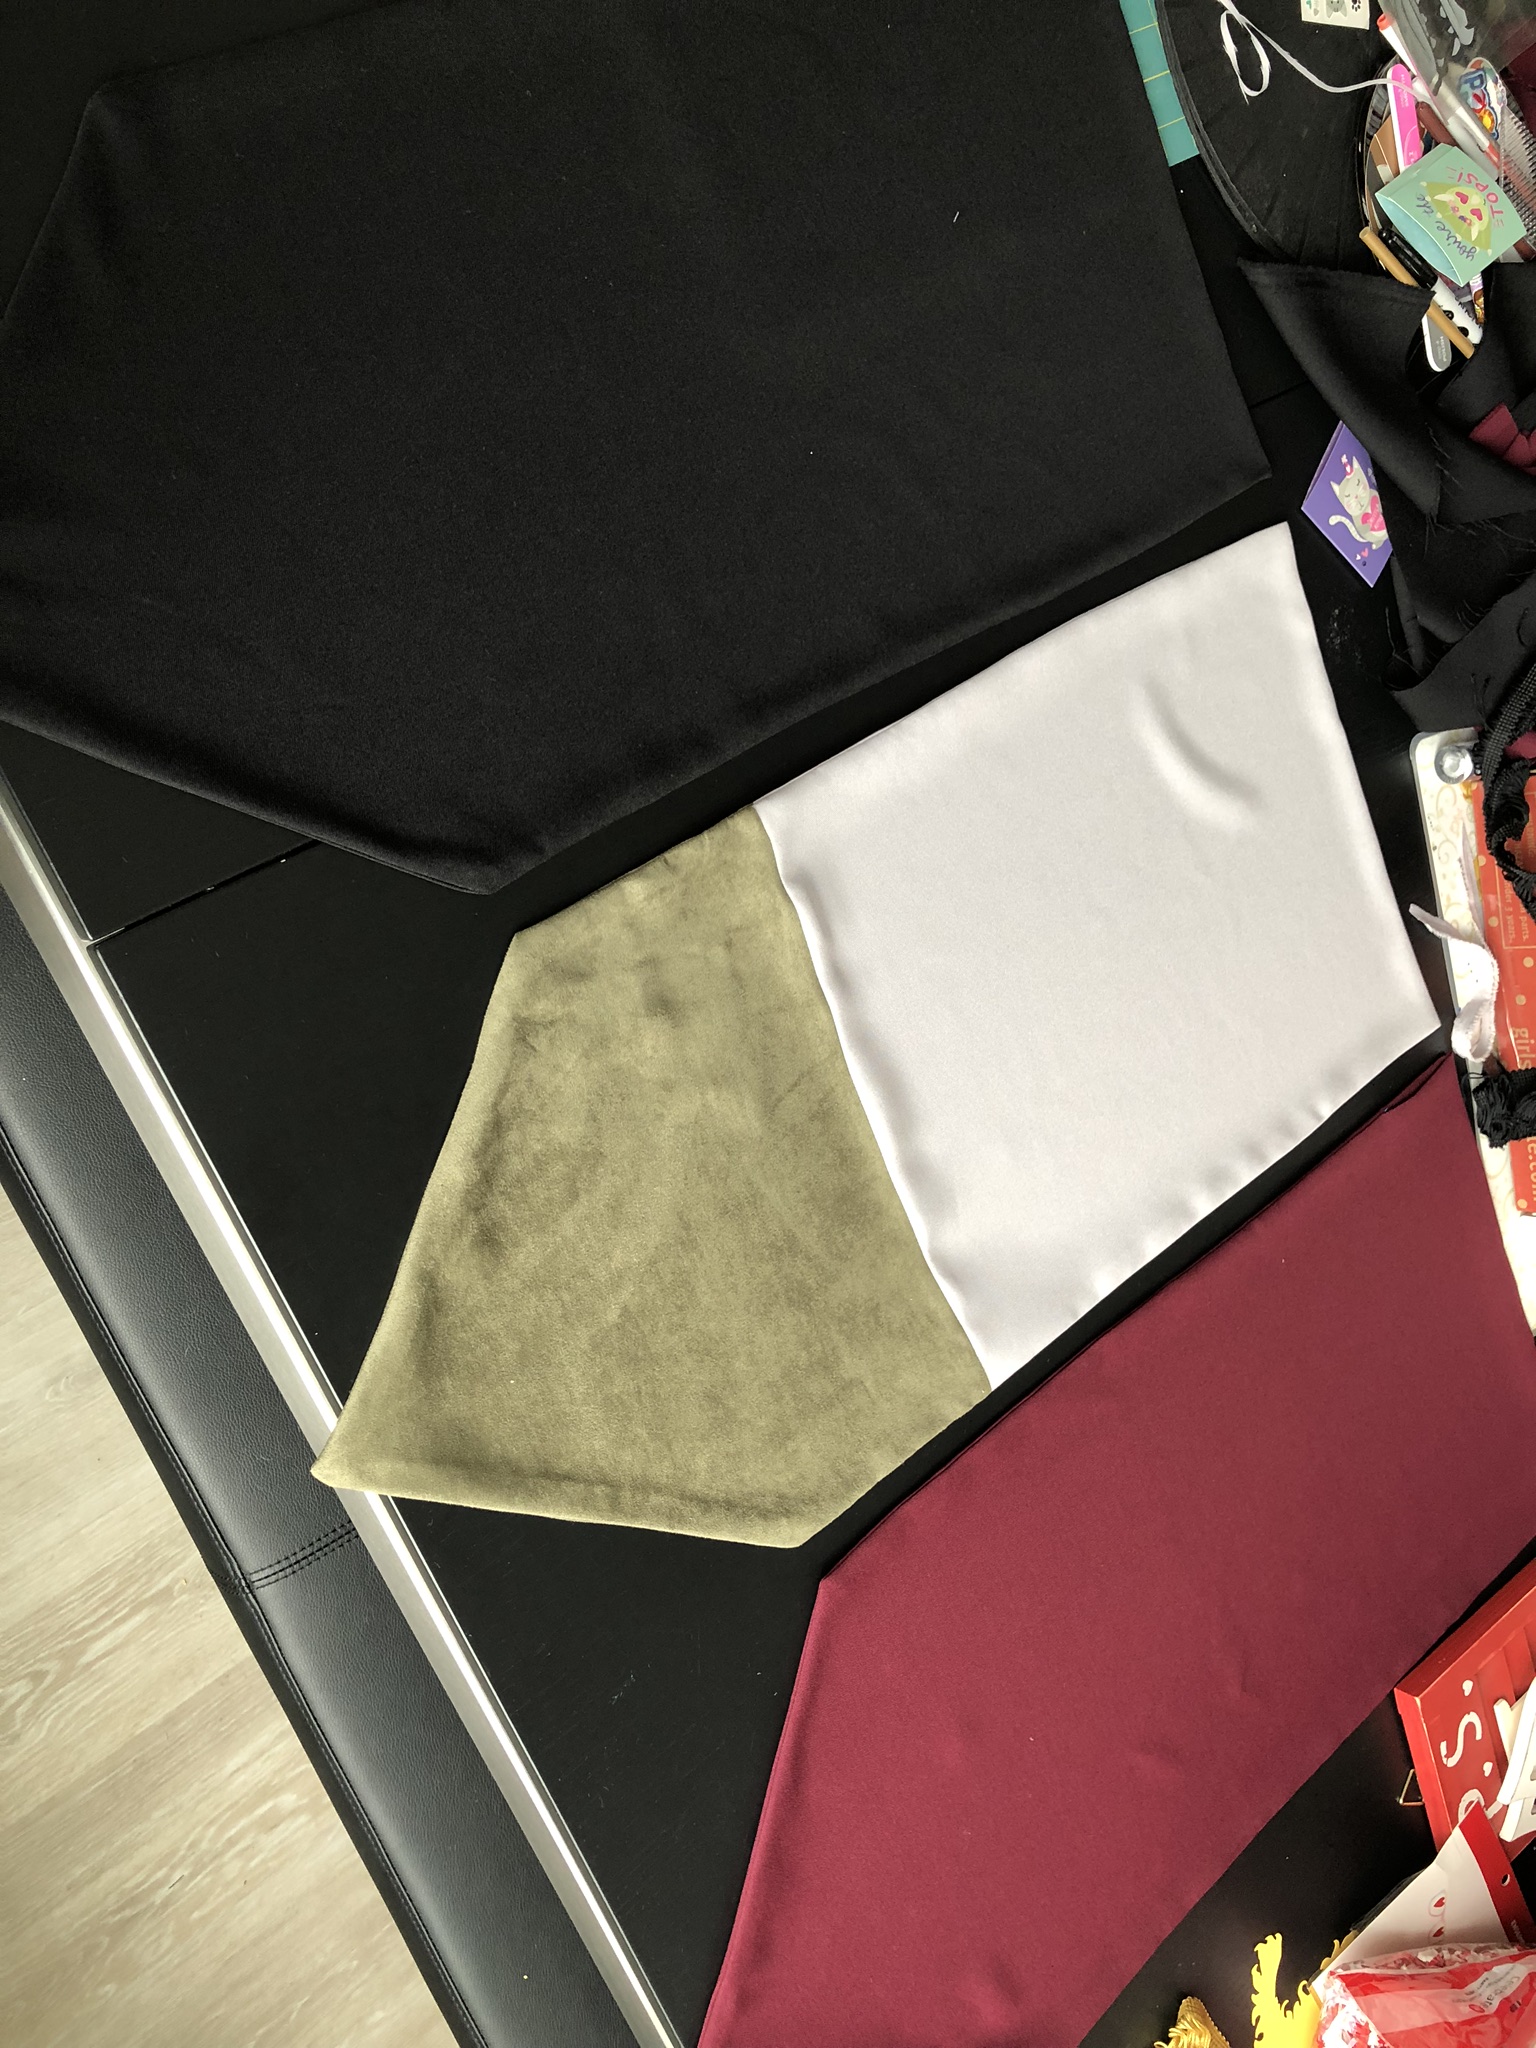
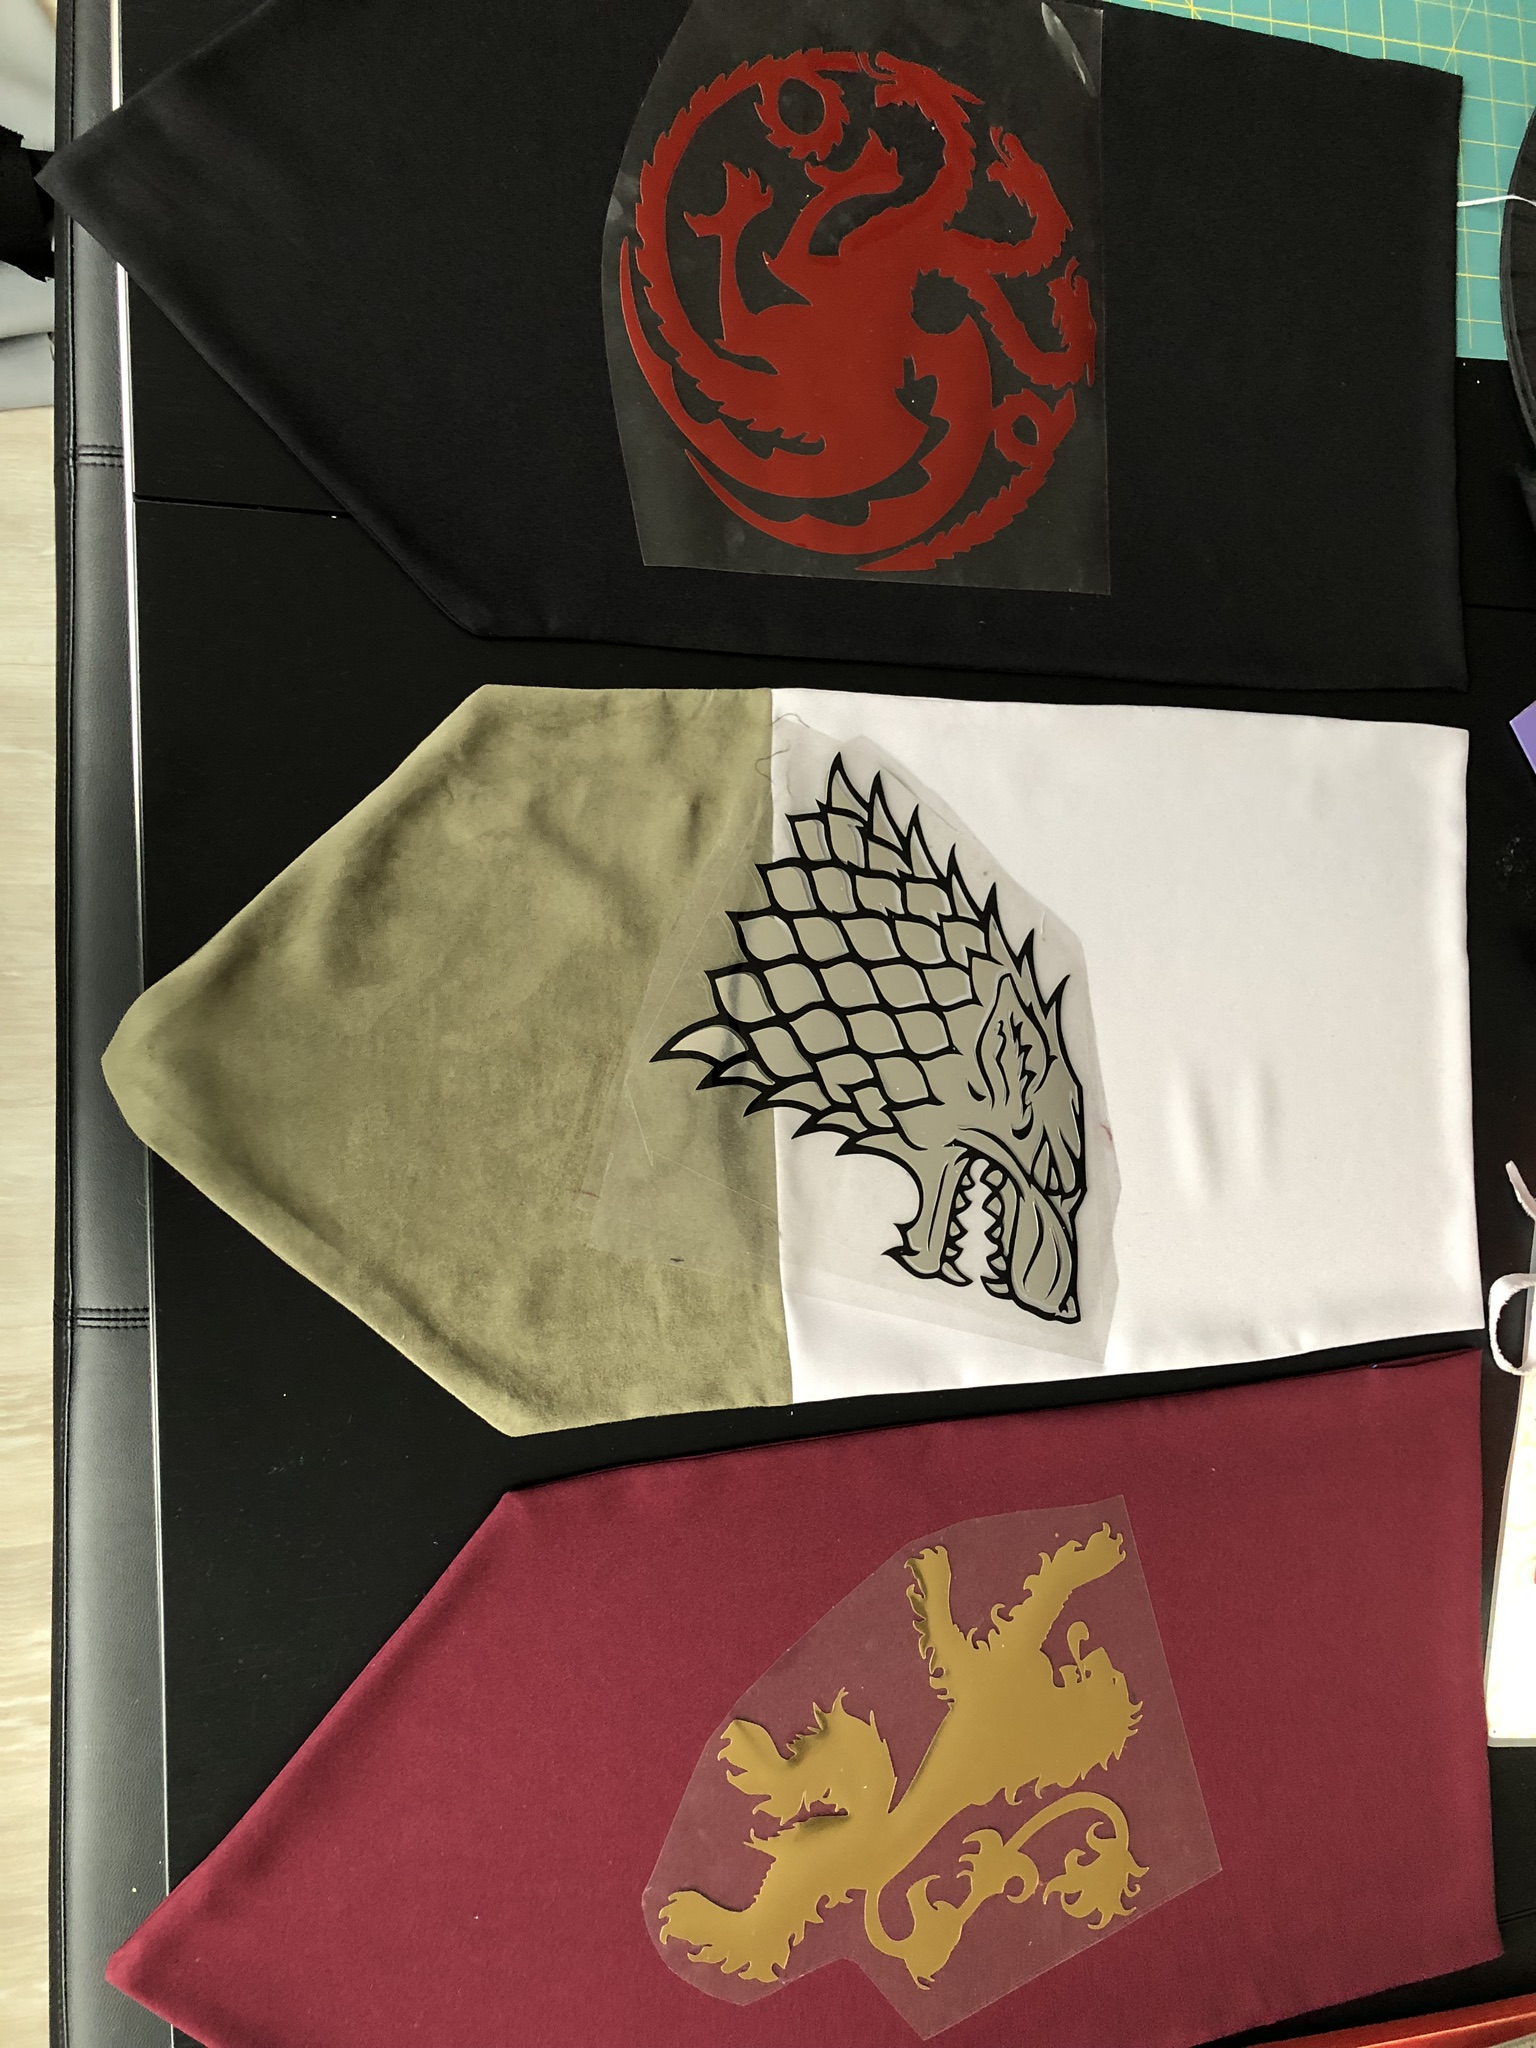
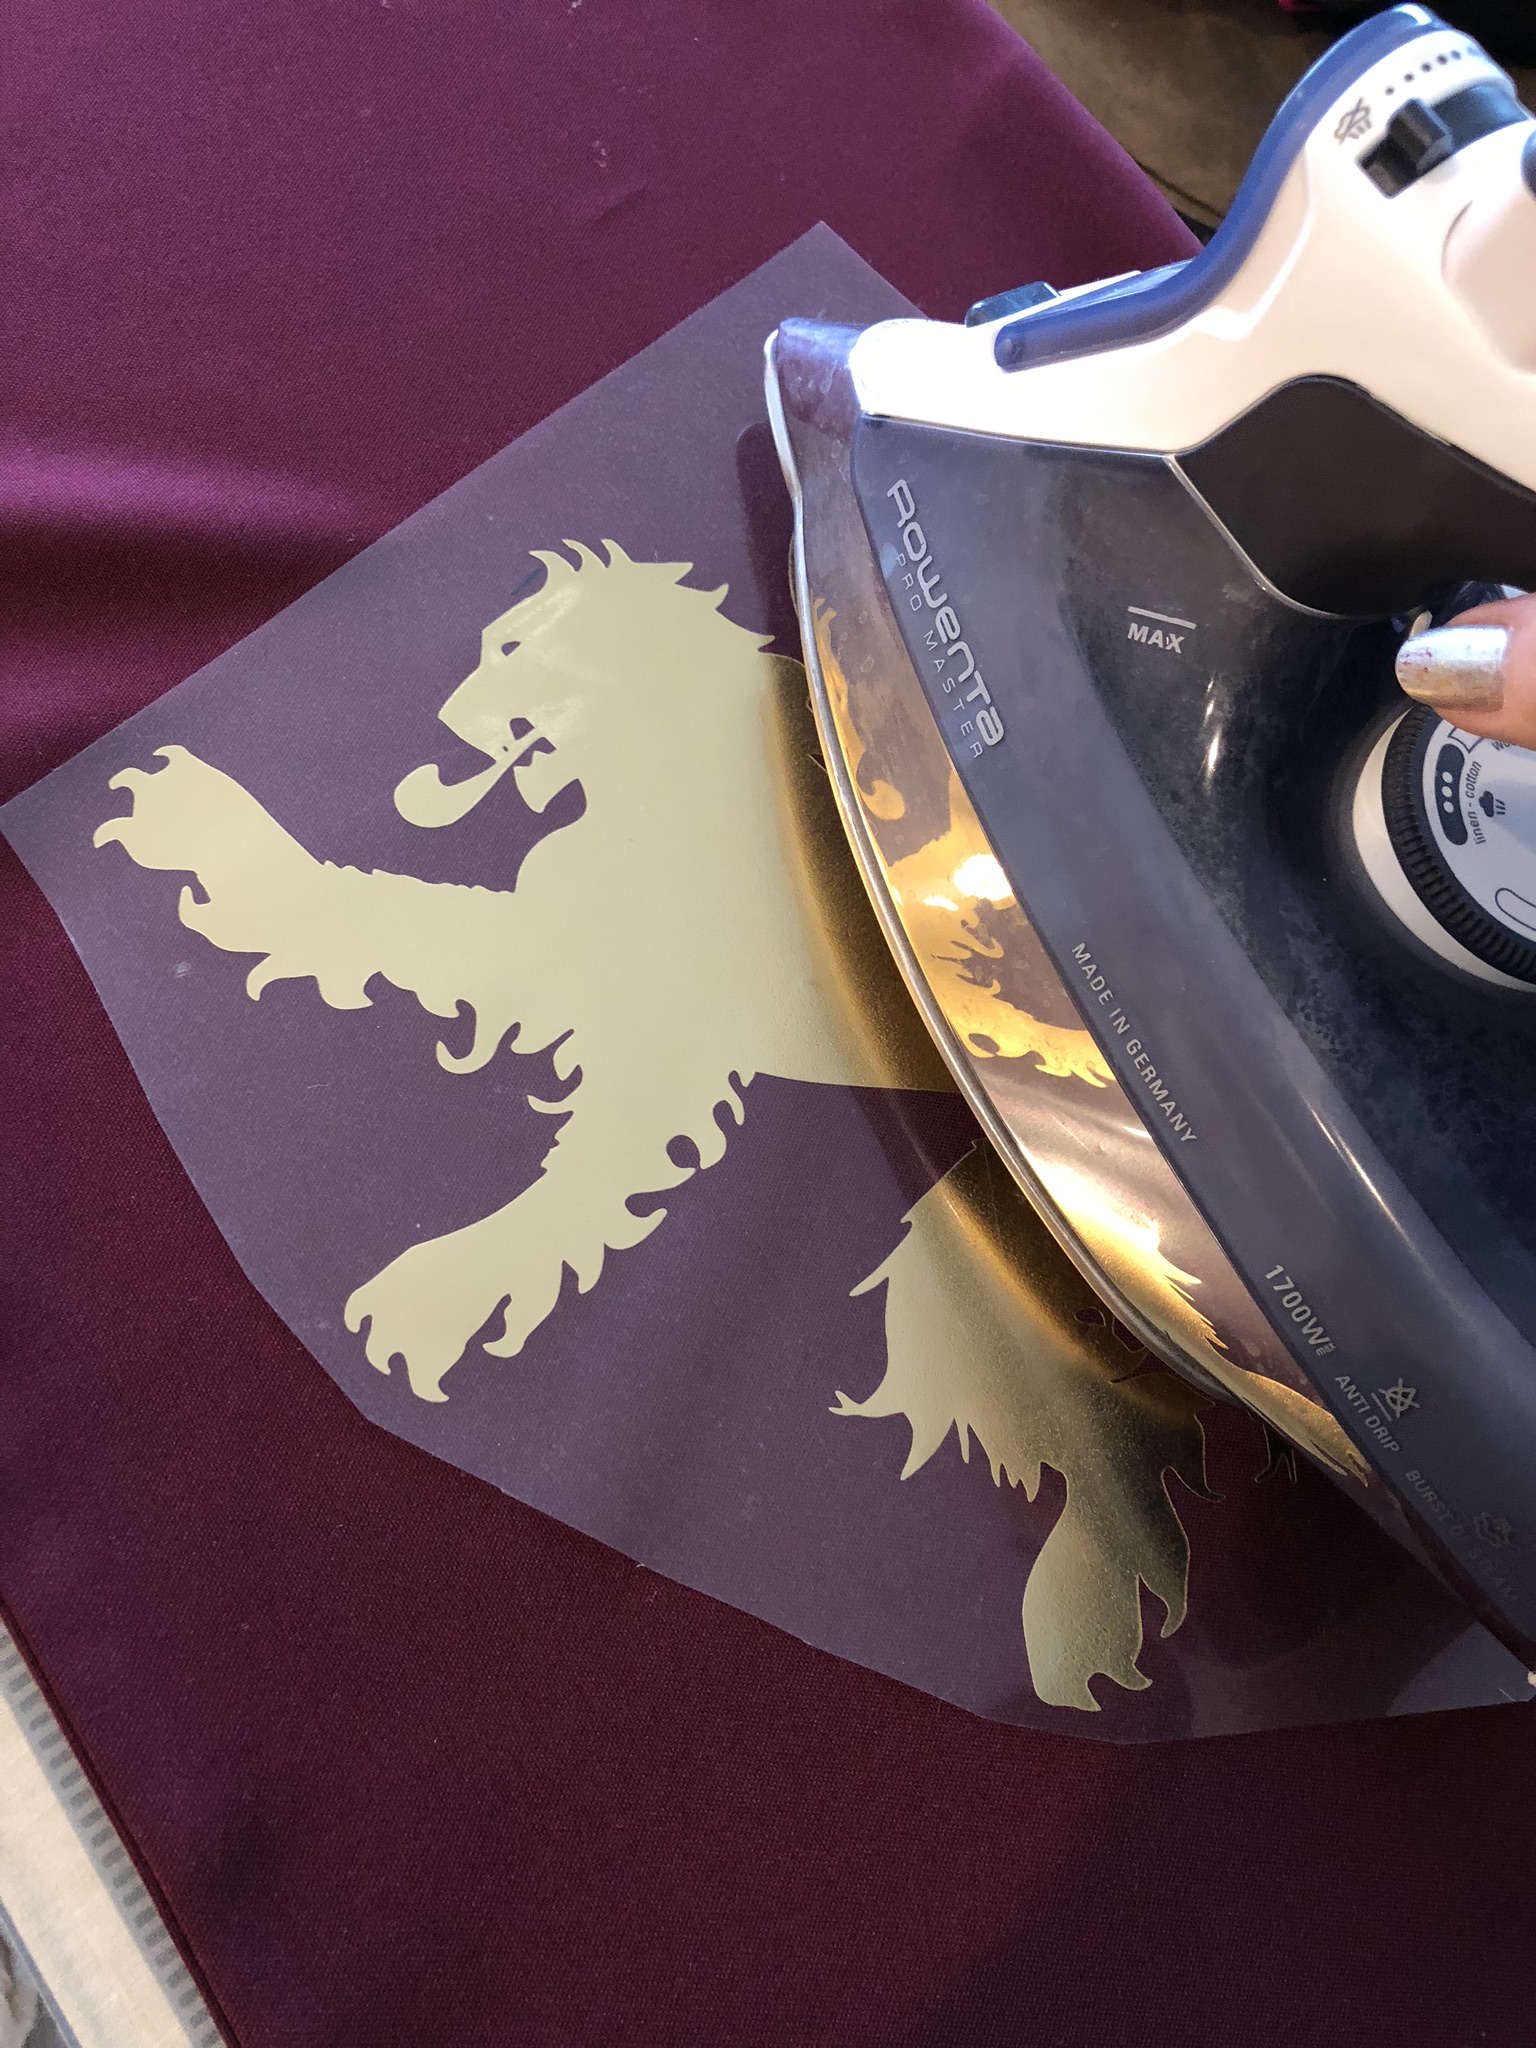
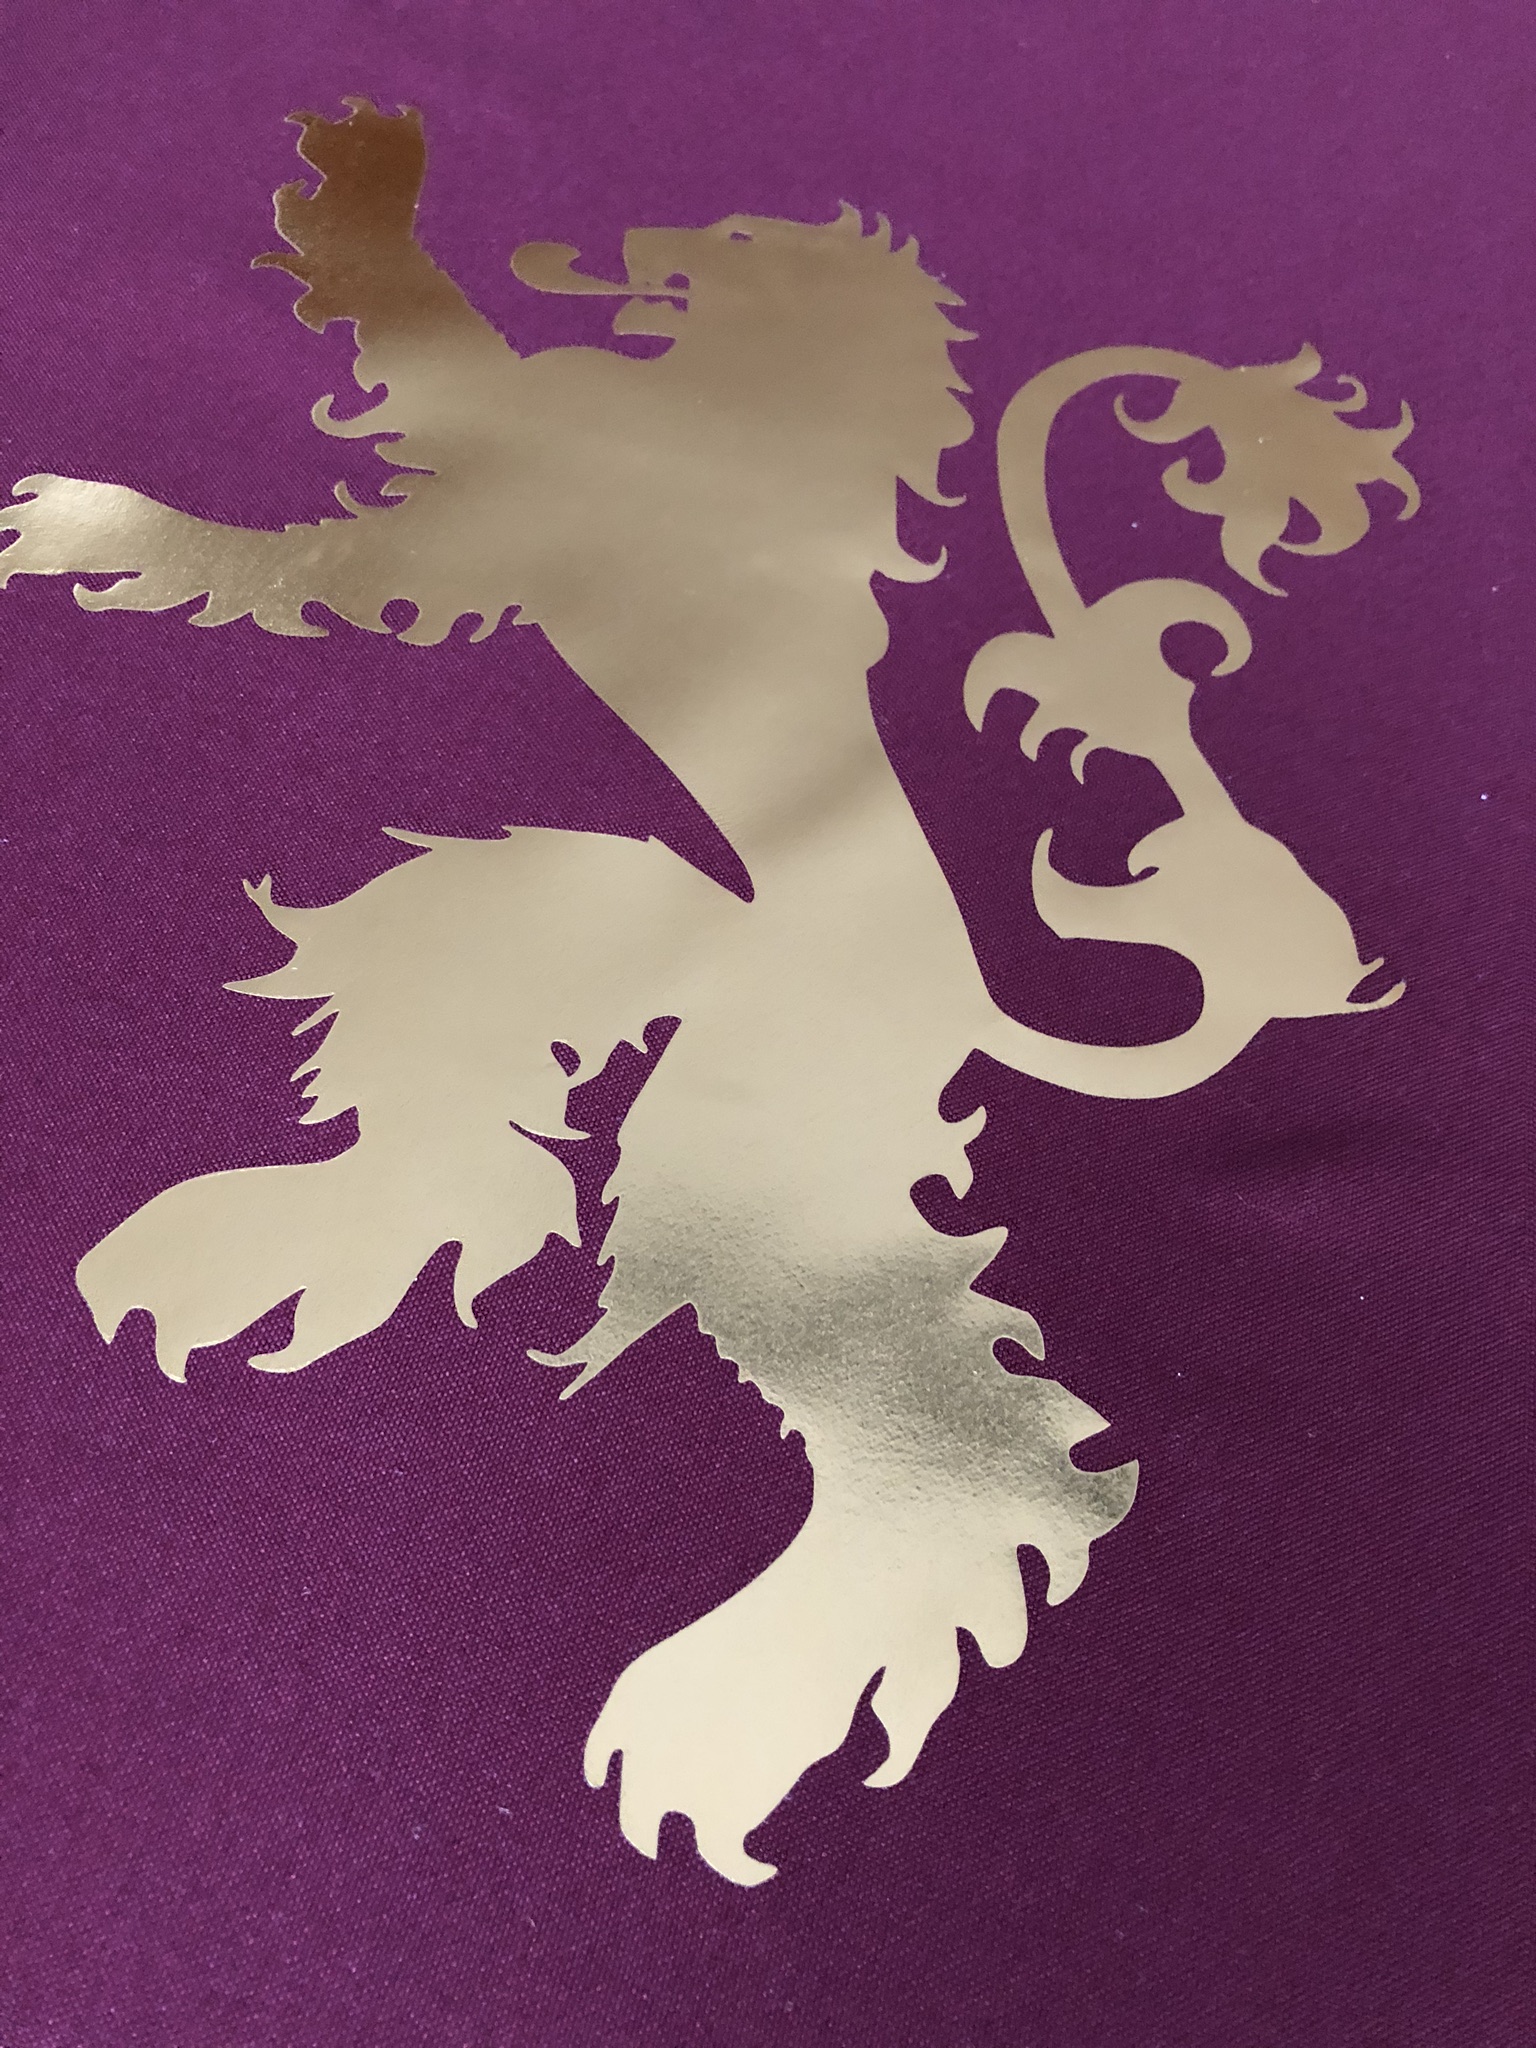
House Sigil Banners (of the large fabric variety)
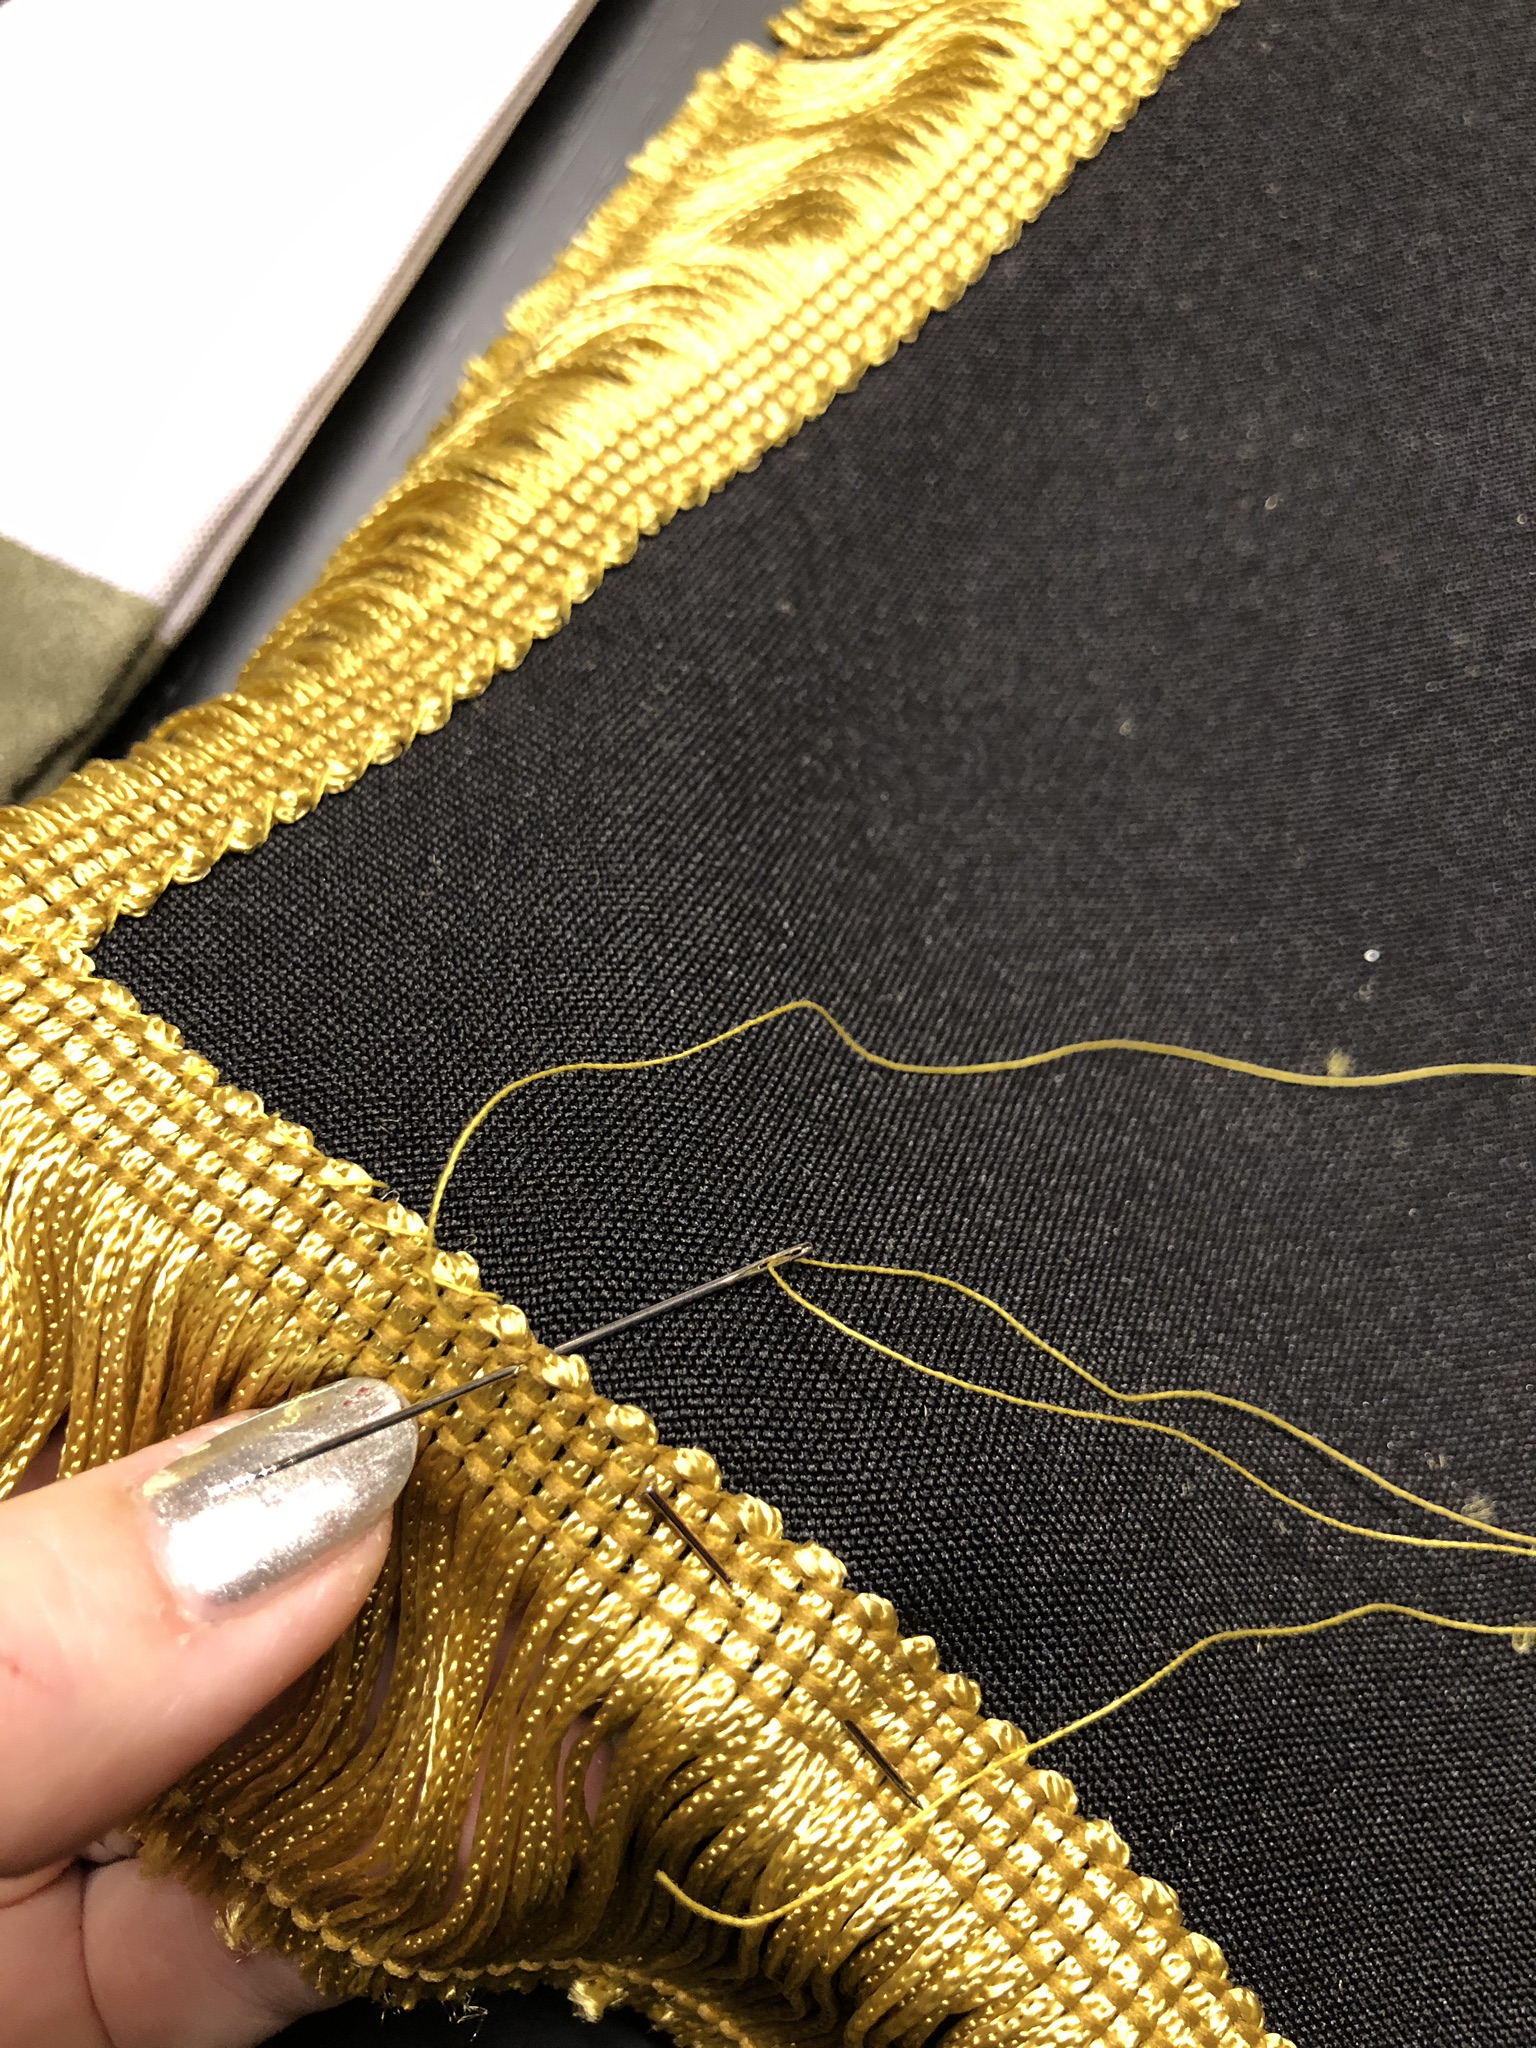
These banners were made using the same SVG cutting files for the Targayren, Stark and Lannister sigil shapes. I cut them out using the Cricut onto metallic iron-on heat transfer vinyl. I bought half a yard of fabric for each of the banners, which I made 15 inches wide and 30 something inches long, with a 45 degree V shape at the bottom. I cut it in double and sewed them together inside out so when turned the right way around they would form a nice sewn folded edge. I kept a 2″ ish opening at the top to be able to insert a small wooden rod through the top to hang them from. I ironed on the designs, and then finished up by adding gold and/or black/and or red tassel trim to the bottom and top.
Weirwood Tree
This tree was a bit of a hack rather than starting from scratch. I had an existing tree trunk with branches that was a Halloween decoration. I noticed how similar it looked to the Weirwood trees that have the faces in them, so I figured I could reuse it (my original plan was to cut down some actual tree branches to use, so this saved a big chunk of time!). Weirwood trees have red leaves with 5 points on them, so I found clipart of a sycamore leaf that I imported into cricut. I cut out a bunch of leaves in 3 varying sizes to give it a more realistic look, and then simply hot glued them on using different angles. I finished by adding some moss to the bottom trunk/root area and sticking it on a wood base. I think this guy looks really cute.
Night King of the White Walkers
Again, this one was a 3D print so credit goes to the designer and the file is here.Once it was printed, I simply and sanded it and painted using craft paint. The eyes were tricky and I don’t think I really nailed them, but it was the best I could do. The armor I was quite happy with – I used a gunmetal base and then added some light silver metallic paint randomly across it to look more like the real thing. I stuck it on a wooden base and hey presto.
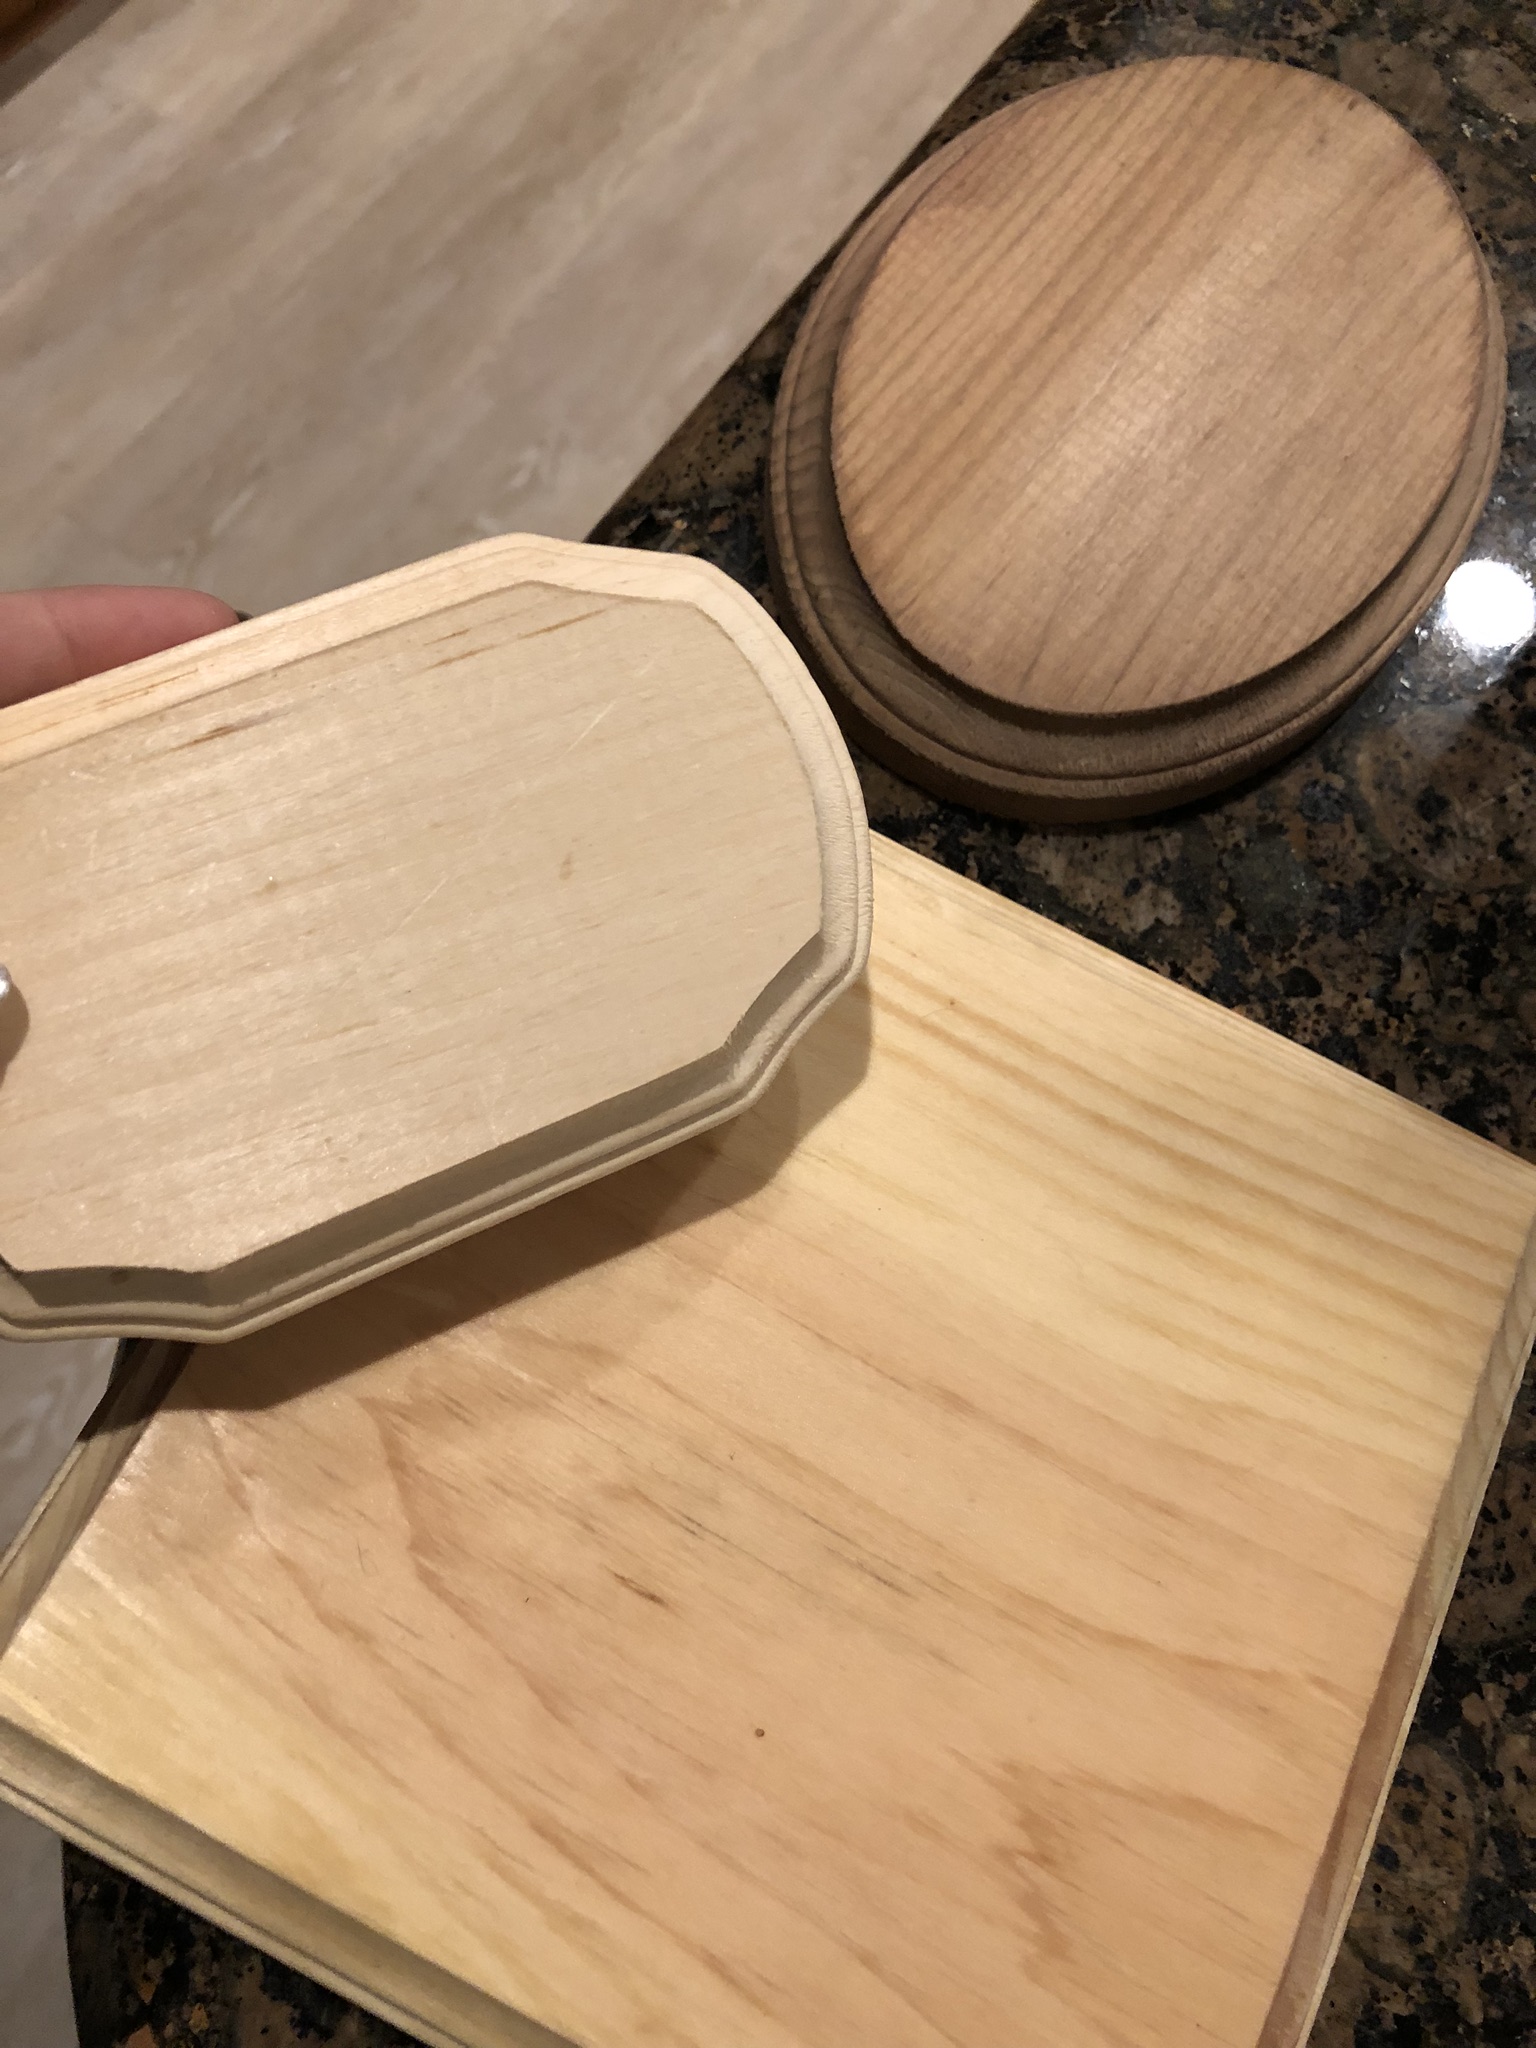
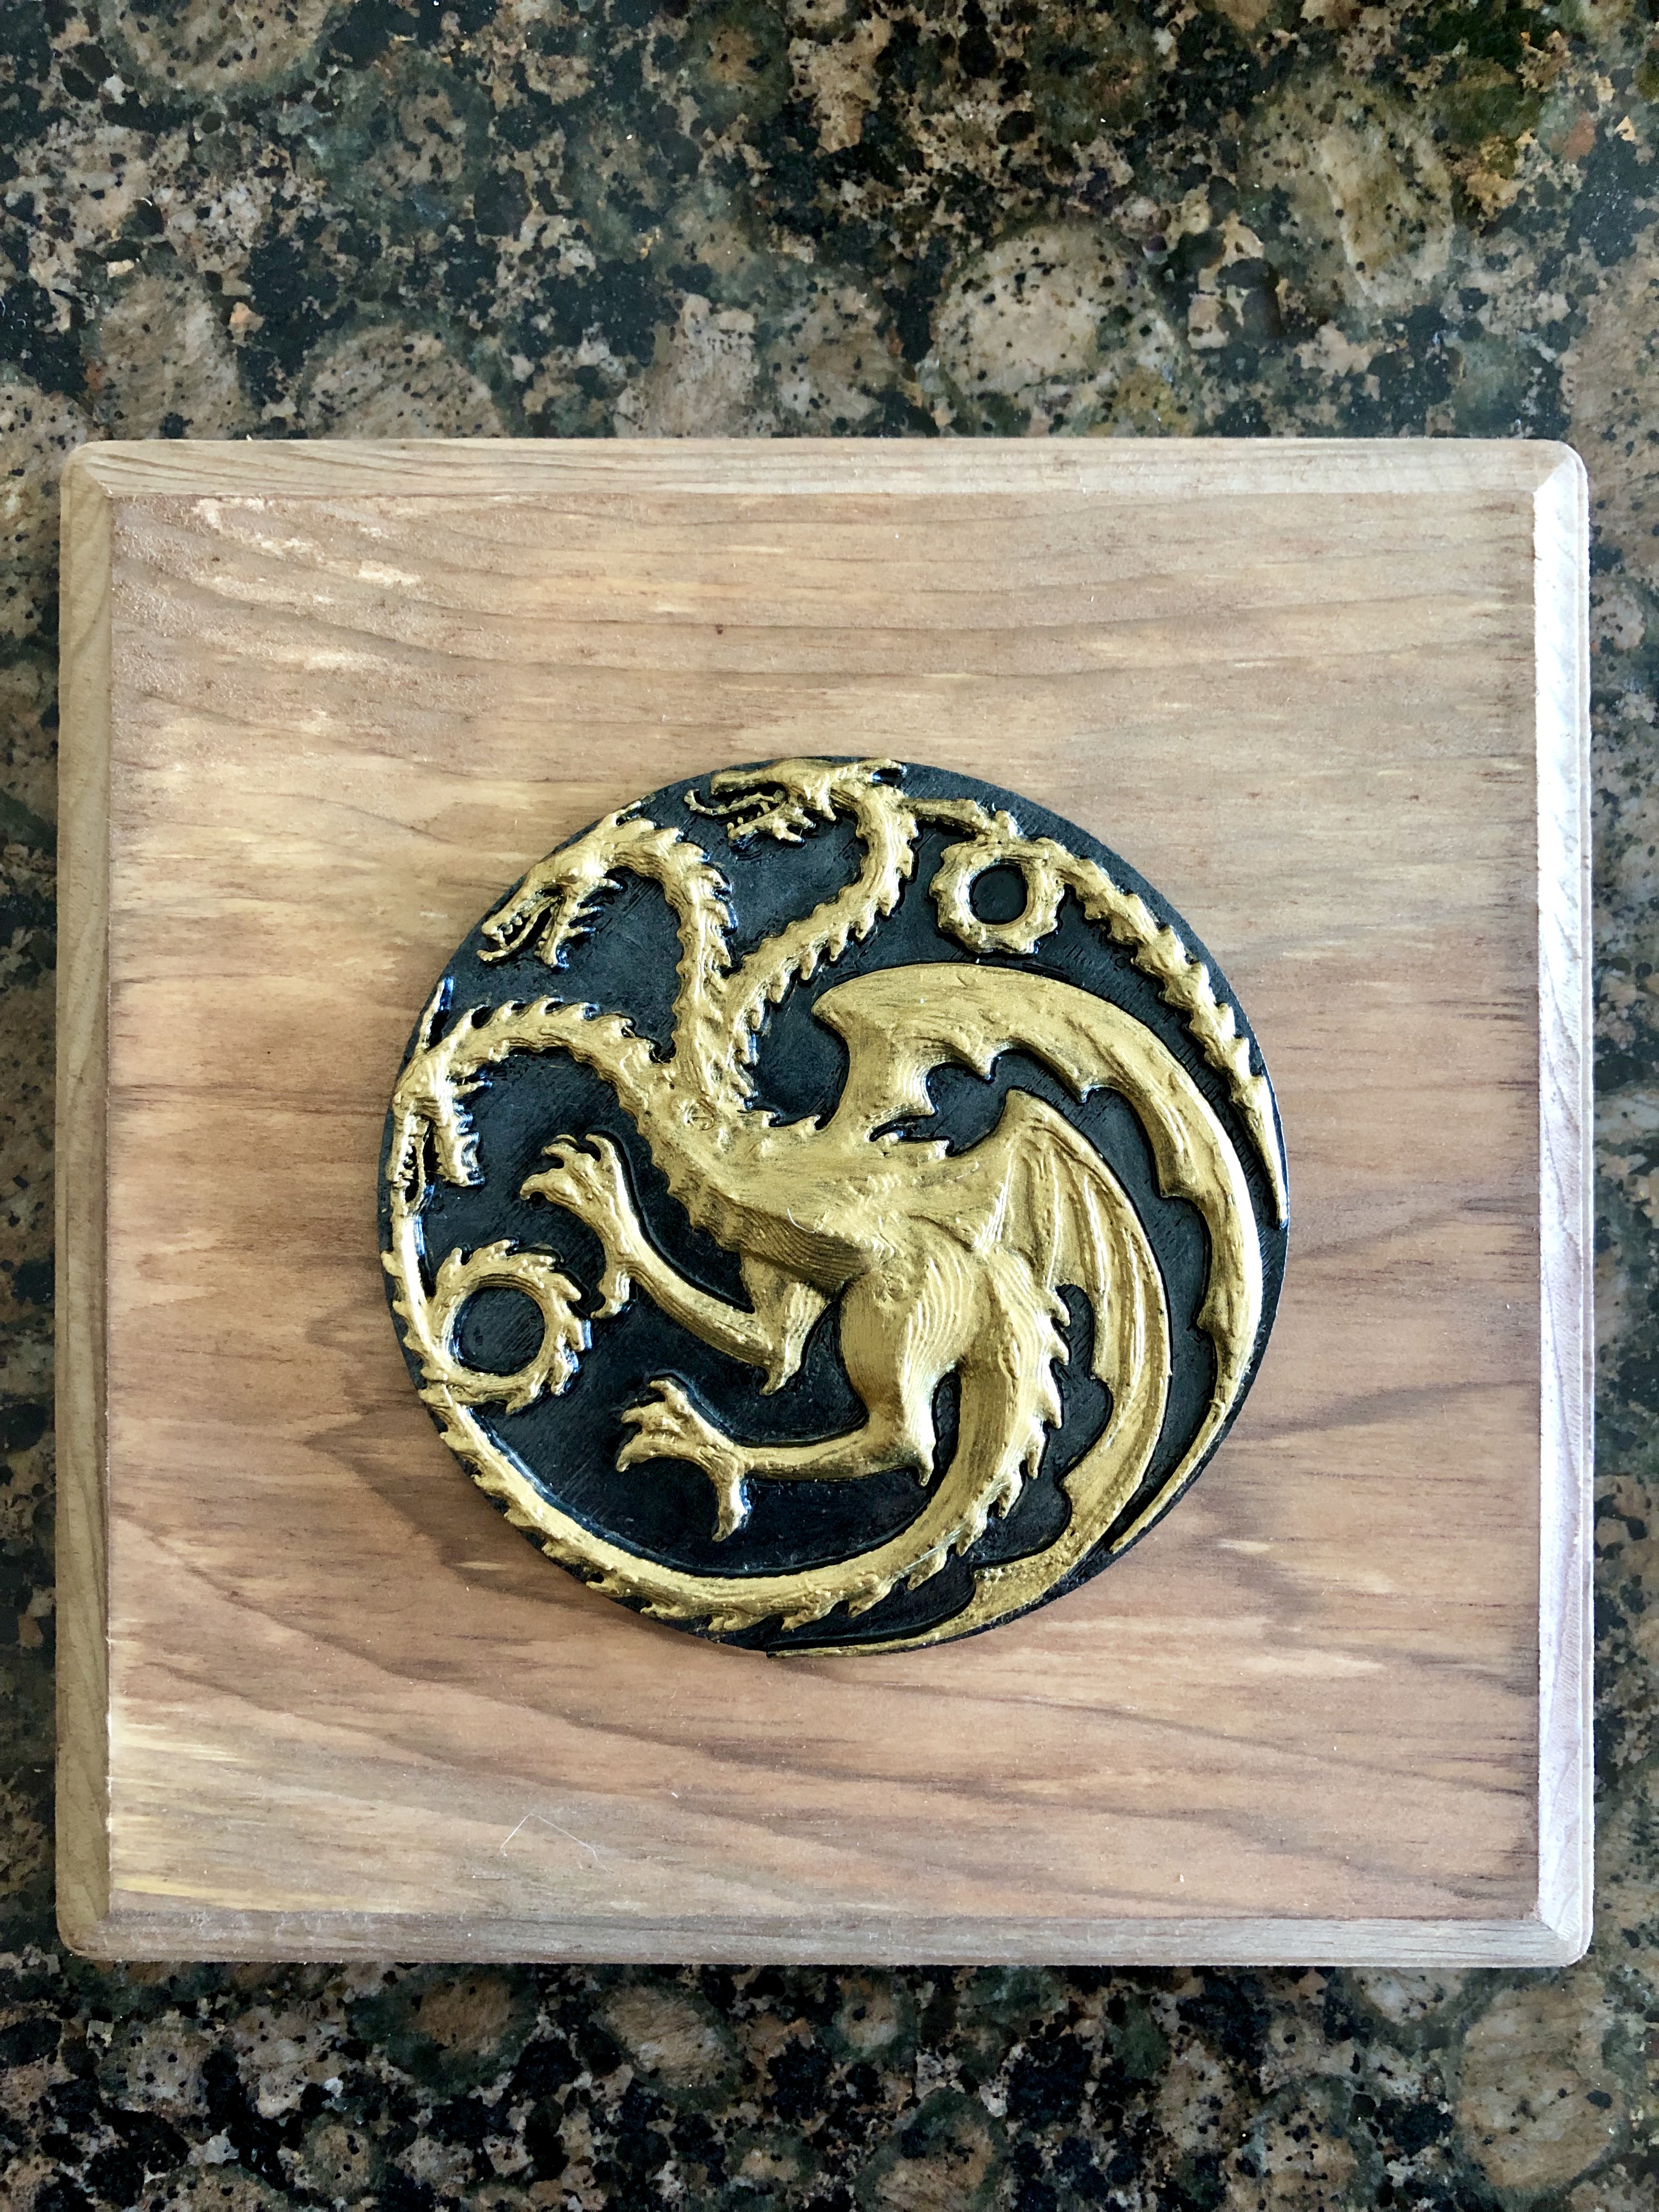
House Sigil Signs (of the wooden variety)
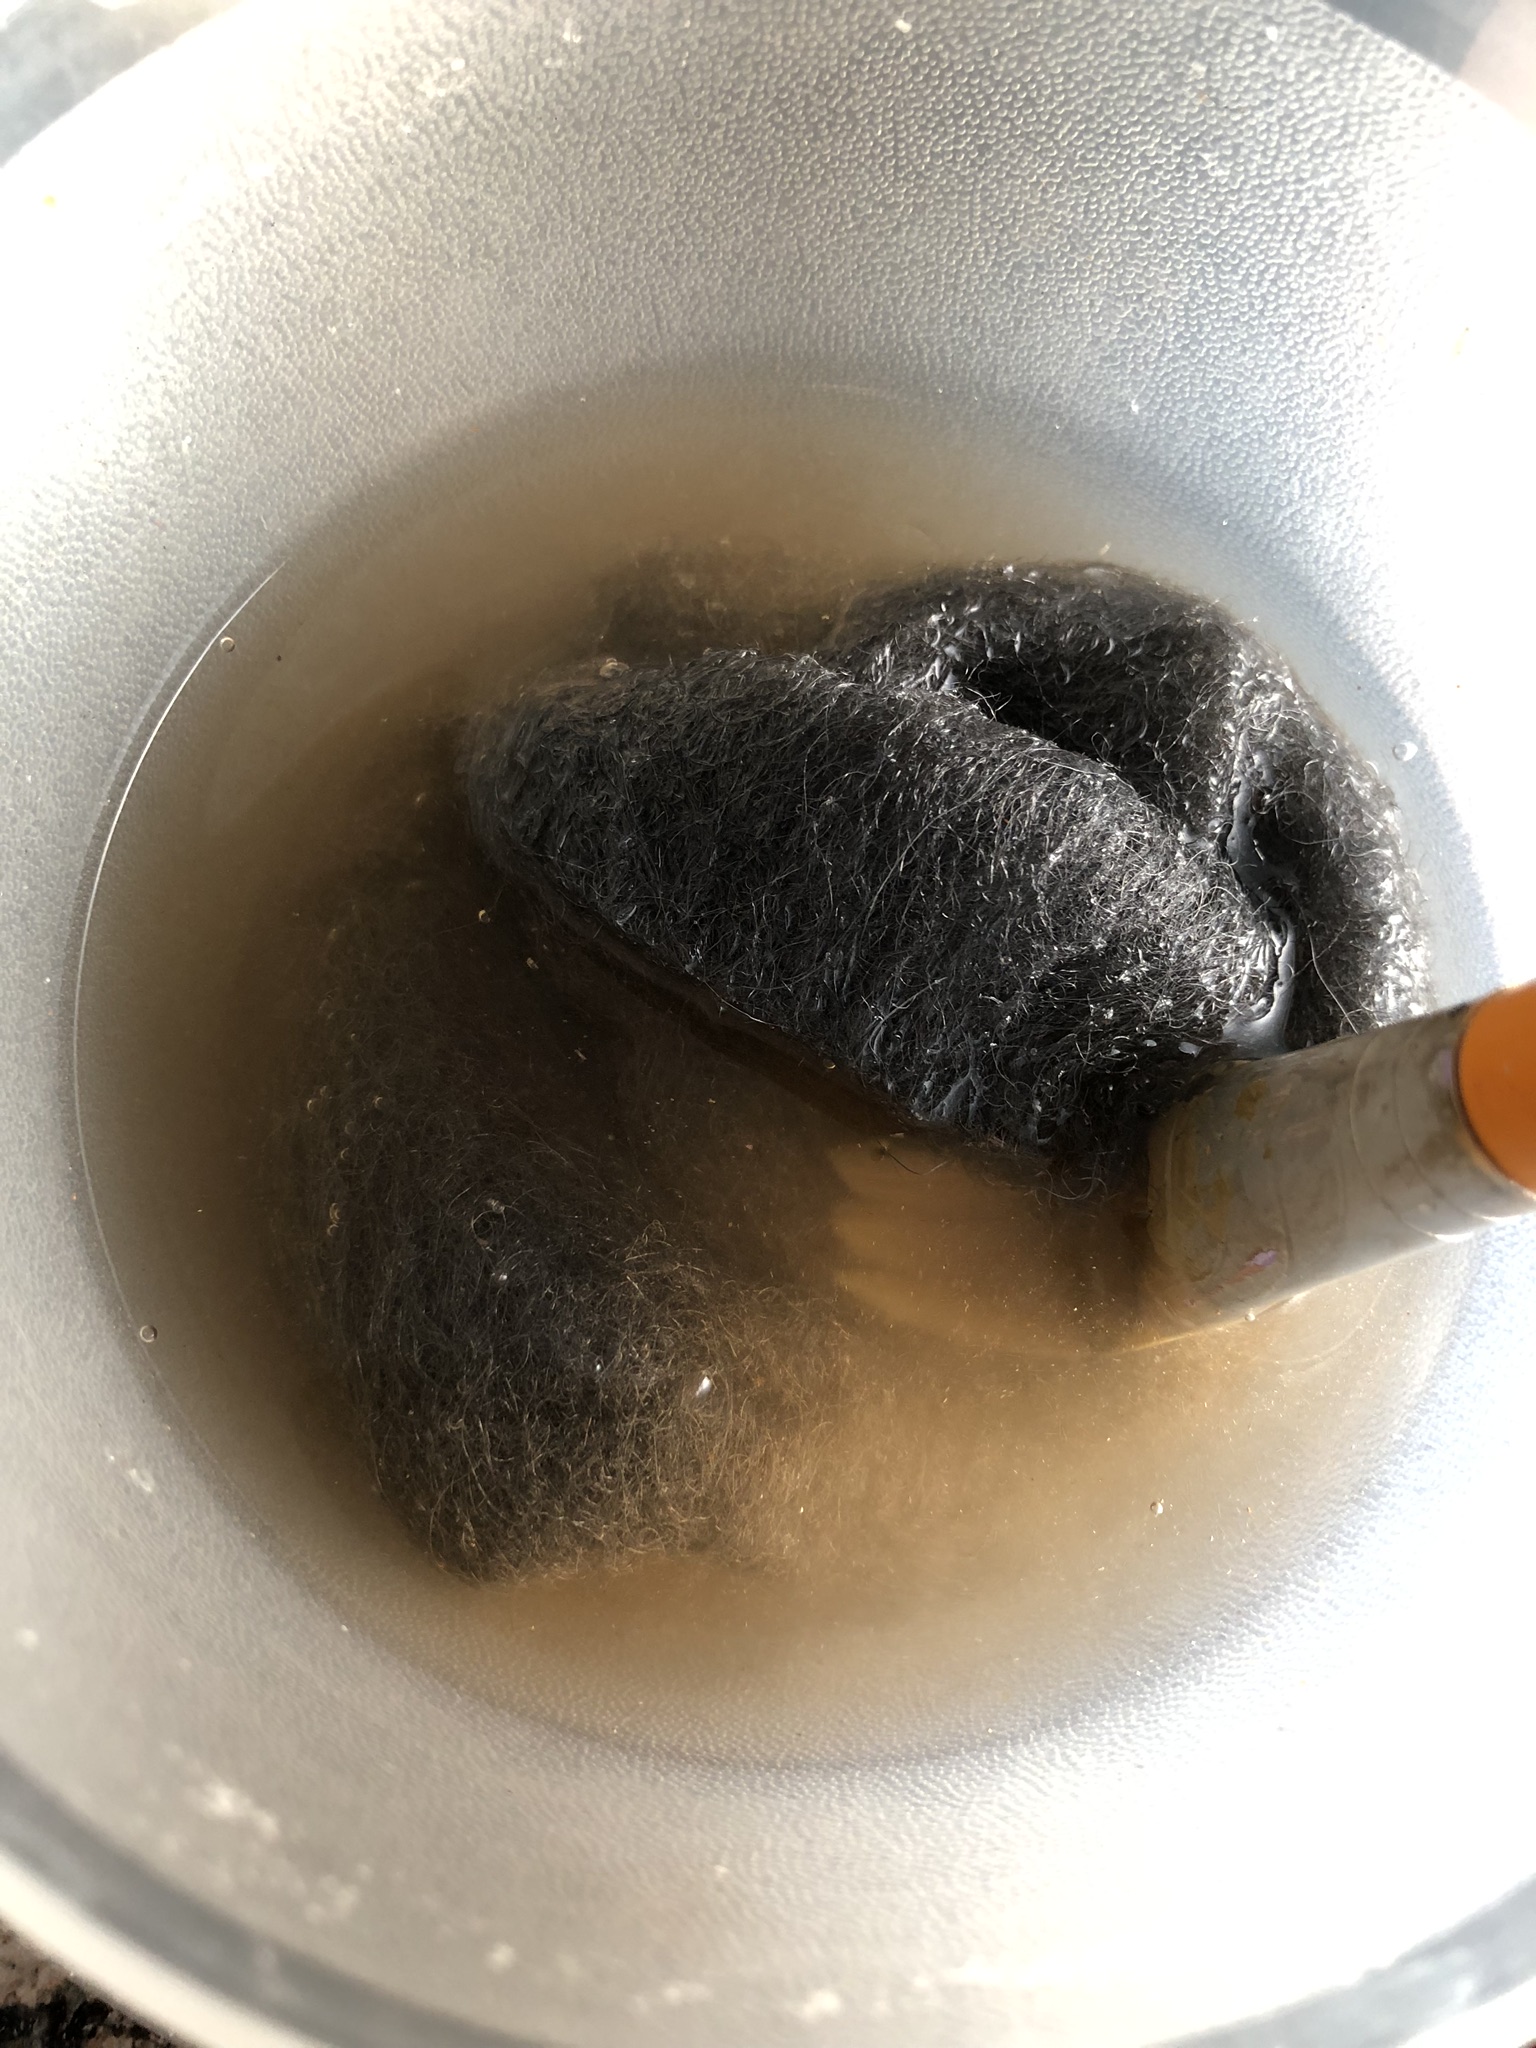
More 3D printing, this time of the house sigils for Stark, Lannister and Targaryen. They were pretty quick and easy paint jobs – for the Stark sign I reused my metallic gunmetal and silver combo trick to give it that aged, worn look. I wanted to add them to wood, so I picked up some cheap wooden plaques at Michael’s and Joann’s, but didn’t want it to look too new. So I researched how to “age” or “weather” wood and came across this amazing and unbelievably simple trick. You simply take some steel wool (the finer the better) and add some vinegar to it in a small pot. Keep it stewing for an hour or two and the liquid starts looking a little murky. Brush this onto your wood thickly and in the beginning it looks like not much is happening. Give it 10 minutes and it’s like some miraculous transformation – it darkens and has this cool old looking variation of color.
Hand of the King Pins
I found the pattern online and printed up a handful of hand of the king pins to give away as prizes at my premier party. I painted them gold, added brown antiquing wax to age it, and then simply hot glue gunned a safety pin on the back. I also added one to a wooden plaque to use as a decoration for the table.
Dragonstone statue
This is a bit random, but I found a cool 3D print pattern for the stone statues at the gates of Dragonstone. After printing it, I used a chalk gray paint to look like stone, and then sponged on a lighter gray chalk paint to give it more realistic dimension and that aged stone look.
Medieval Looking Goblets and Tankards
This was a really quick, easy and cheap way to add suitable decor to the table. I took a visit to the local Dollar store to pick up half a dozen or so dollar glasses (select the Middle Age-styles ones – large goblets and tankards are great). Then get some spray paint. I used two different techniques. The easiest one is to spray paint the outside of the glass using champagne gold and then add a little silver in a fine mist over the champagne to make it look like that slightly aged metal. The other technique is a little more involved but I think it looks cooler/more realistic and has less of that slight giveaway spray painted look. Buy some “looking glass” silver metallic spray paint. Spray it on the INSIDE of the glass, wait a minute or so, and you’ll start getting a mirrored metallic effect and then lightly spray a little vinegar on top of the paint, which etches it so it creates a realistic hole in the metallic reflection. If you want, when the looking glass paint is dry, you can add a layer of champagne gold spray paint over the top of it on the inside of the glass so that it is a matte gold that shows through in the areas where the silver was etched away. This technique looks very realistically like mercury glass. With either technique you can add then finish up the drinkware by adding “jewels” in various patterns. I actually used double sided tape to add them as I wanted to be able to easily remove them if I wanted to reuse the glasses for other events without the jeweled effect.
Finishing Touches
To add a little extra to my table, I included the following:
Coins – these were a mixture of pretend plastic money, along with real silver dollars and other old coins that my husband had in his collection. I mixed them up pretty well so there’s going to be a very tedious separating process to go through someday! I added some “jewels” to the coins too.
Flowers – I used silk flowers in my color combo of red, burgundy, grey and yellow.
Candles – I used some great old-looking candlesticks, as well as some small candles that I had used the mercury glass spray paint technique on.
Dishes – I used a combo of gold and champagne gold plates, many of which were actually plastic from Michaels. I also used some cake stands to add variation in height.
Food – while this will be more of the focus for my actual party, for this dry run I did a quick brainstorm on what food would look like a medieval banquet and came up with bread, cheese, meat and fruit. After I took photos we had a friend over and we had a nice feast 🙂
Bottles – I found some colored glass bottles at the dollar store that had that old look so I picked up a few. I also added in some other old looking clear glass bottles that I had kicking around the house waiting to be useful.
Plastic skull – a Halloween decoration that I already had.
Backdrop – I found a cheap vinyl backdrop on Amazon that looks like old stone that you’d find in a Medieval castle. It wasn’t wide enough (only 5 foot) so I added red curtains to either side to look regal. I hung them from a photographer’s backdrop frame.
Hope this serves as some inspiration for your own Game of Thrones parties!